Tuesday, January 31, 2006

Chicken, avocado and orange salad

.
.

Another meal done using some of the leftovers from our hot pot dinner. I think it is useless to go into details here. Fine chicken slices were quickly poached in a vegetable broth and were mixed with baby greens, fennel bulb slices, red peppers, oranges and avocadoes. The dressing was a simple orange, balsamic and olive oil vinaigrette. It's good to eat something simple and healthy once in a while.

Cilantro and garlic shrimps with a touch of Australia

.
.


When I opened the mail box a few days ago I found a large blue envelope sent to me by Noodle Cook straight from Australia. The fact is that Noodle Cook offered a variety of prizes not only to the winners but to all the participants (see here and there) of the Paper Chef #13 event. As soon as I opened the envelope, a wonderful smell filled the air of my apartment. Curiosity having a very strong effect on me, I had to find a way to work with these spices, and fast!

As I told you in a previous post, we recently had a Chinese hot pot party at home which resulted in my fridge overflowing with unused food. This is how I used all the shrimps leftover.

First of all, garlic… Shrimp and garlic go together like peanut butter and jam. For about a pound of shrimp, I used a whole head of garlic but feel free to use more (or less but really I don’t see why you would want that).

Then cilantro… Fresh, fragrant and beautifully green… it goes perfectly with shrimps too. I used a good handful of chopped cilantro.

As for the recipe... I simply sautéed the shrimp in oil and garlic, along with some red pepper for color and sweetness and some chilli pepper flakes for heat. I then added a good pinch of wattleseed powder to the mix simply because I loved the smell and thought it would go well with the flavours already in the pan. After reading about it, I realise that wattleseed is more often used as a flavouring ingredient in sweets and for roasted meat but, as my little experiment showed, it works as well on shrimps. After a few minutes, I also added a little bit of white wine and, during the last minute of cooking, some chopped cilantro.


The result was quite pleasing but the wattleseed was not finely ground leaving black specks all over the shrimps. Nothing to worry about when you grill but not perfect for a dish served with its own sauce. I’ll get to know this spice well enough soon to avoid these little imperfection but in the meantime we still enjoyed a delicious meal.

Stuffed baby squids

.
.


A few weeks ago, Stephen from Stephen Cooks posted a recipe for Baby Calamari Stuffed with Shrimp and Pancetta. I thought the idea was fabulous and decided to make my own version.

For the Chinese New Year, Fufu and I organized a Sichuan “hot pot” diner to celebrate the year of the Dog. Hot pot, or “huo guo” (火锅), is a home favorite for such celebrations. It resembles the western “fondue” in that diners cook a variety of meat, seafood and vegetables at the table in flavorful broths. After this great dinner, we still had tons of leftovers uncooked ingredients including some baby squids. The day after I cooked those delicious baby squids stuffed with prosciutto inspired from Stephen’s Baby Calamari Stuffed with Shrimp and Pancetta.

To do this, I used the trimmings from a piece of prosciutto ham bought at a discount price from the butcher as well as some frozen baby calamari from a local Chinese grocery store. The prosciutto ham was cut into very fine cubes and cooked with onions, garlic, red peppers, salt and pepper. Near the end, I also added the chopped tentacles from the squid and some chopped parsley. I then stuffed the squids and baked them for about 5 minutes in a 375º F oven and an extra 2-3 minutes under the broiler.

I served them with a bit of olive oil and reduced balsamic vinegar. Ideally I would have reduced the vinegar a bit more in order to increase its thickness but both Fufu and I were starving so time was limited. I also found that the addition of lemon juice added a fresh dimension to the dish. We both really enjoyed the squids and will probably cook something similar again.


Cheers to you Stephen!

Monday, January 30, 2006

IMBB 22 - Lamian (拉面) - Chinese stretched noodles

I know... I know... I have already posted 2 different entries for this edition of Is My Blog Burning but I'd like add this third one.

It is not that I am very proud of my cooking, frankly this attempted recipe was more of a disaster than a success, but this is where I invested the most time and energy... and not only my time and energy but the time and energy of my partner Fufu. She graciously explored the internet and Chinese cooking forums in search of a recipe for what is considered to be the most difficult Chinese noodle to make. She also translated a few recipes to English and helped me in the kitchen during the final stages of my failing attempt at making lamian (拉面).

Lamian is made of dough, itself made of high protein flour, which can be stretched by hand to a very fine thickness. It is generally served with a flavourful broth but few toppings so that tasters are not distracted by the delicate elasticity and taste of the noodle. The Japanese ramen noodles, whose name is written with the same chinese characters, is said to originate from the Chinese lamian but contemporary ramen noodles certainly differ from their Chinese counterpart.

There are many lamian recipes but in all cases the dough is kneaded many times at a fairly warm room temperature. Oil is added to make them less sticky and, after resting for a while, they are stretched by hand to the desired thickness. Many recipes call for weird ingredients unknown even to Fufu herself but I still gave a shot at one of the simplest recipes she handed me.

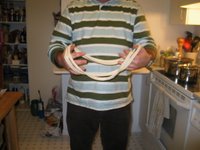
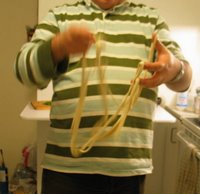
I was able to obtain a fairly decent dough with a very good level of elasticity. I tried cooking a little of it in boiling water and its taste was great and so was the texture. It is with a certain level of pride and confidence that I started to stretch the noodles. I had seen a guy doing it on TV once and thought I could do the same at home. Those of you who have tried to emulate those guys who can juggle pizza dough around their head probably know already what happened next.

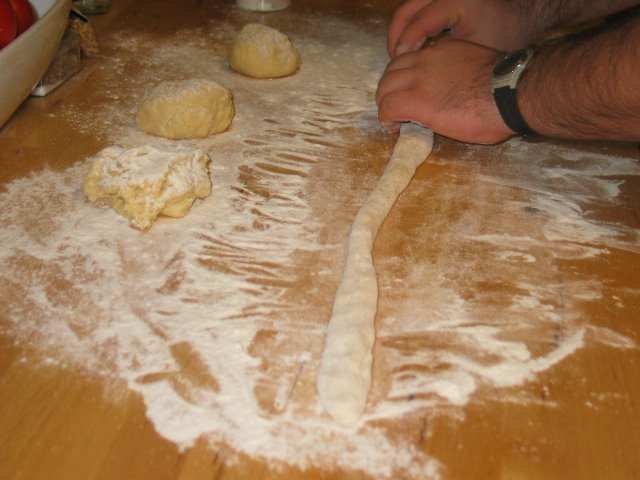
At first, the dough stretched fairly well. I was able to increase its length at least tenfold. But after a certain point, shlop! The dough broke down in a few segments and my still fairly thick noodles fell to the floor. I tried again with a few extra balls of dough but failed every time.

Resourceful, I decided to use my pasta machine to flatten and cut the dough. At that point, both Fufu and I were getting quite hungry and pressure to put something on the table was mounting. I was finally able to flatten the dough which, I thought, would help us eat soon but I was wrong. The machine was simply unable to cut these sheets of dough into finer strips: the dough was simply too stretchy.


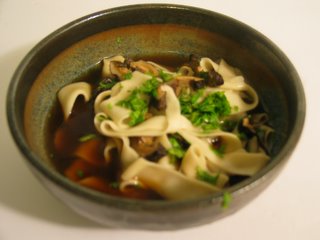
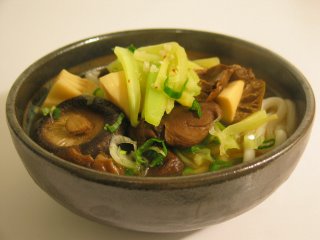
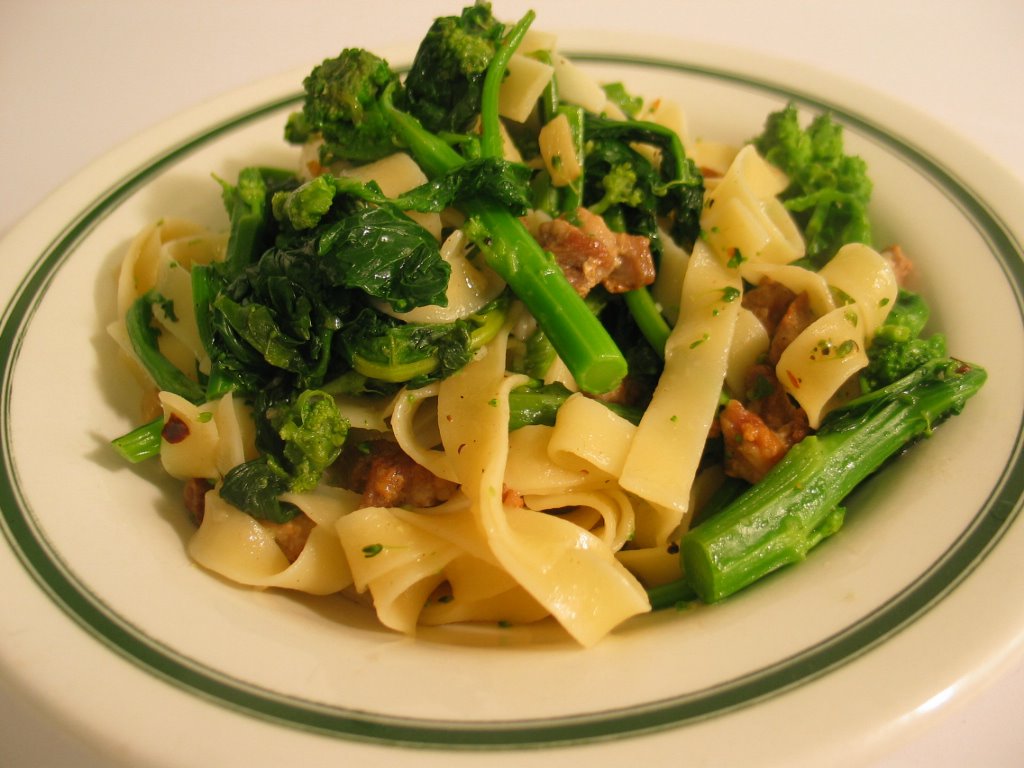
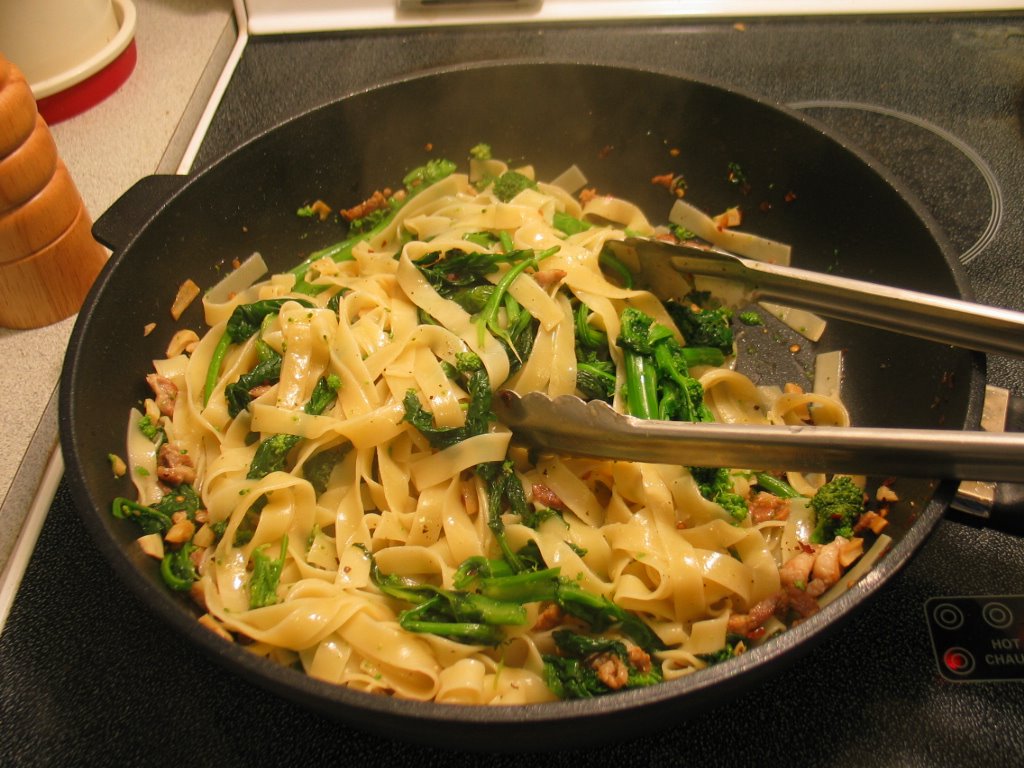
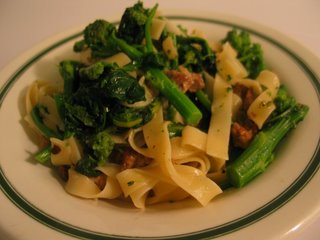
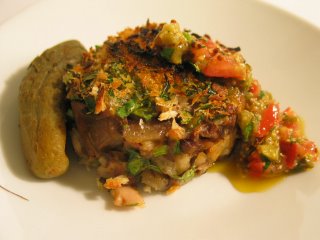
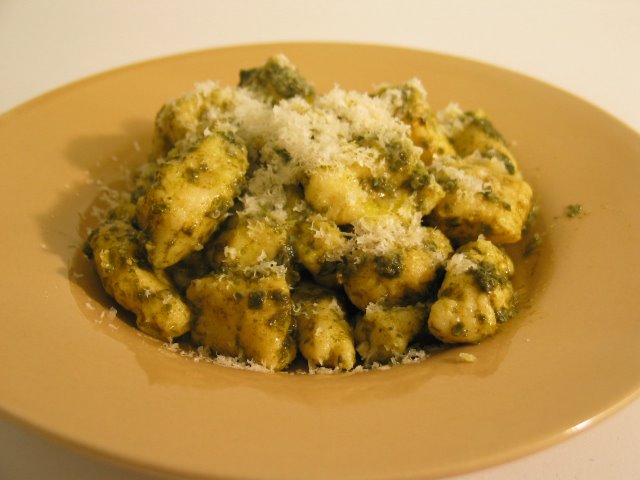
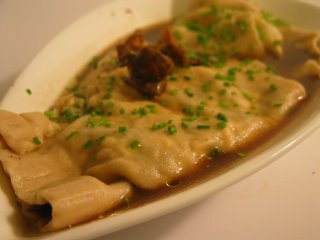
We then tried many ways to get noodles of an edible size and finally get something in our bowls. The only technique that really worked was to make a long snake by hand and then to pass it through the pasta machine to flatten it. The result was quite good and resembled large parpadelle but this was quite far from what we expected to eat in the first time. The next day, during our Chinese New Year celebration, we talked to a friend of ours who insisted on the necessity to use a particular powder made from a Chinese plant when making lamian dough. I guess we might give it a second try one day if we ever find that specific powder or if someone is willing to teach us… but for now, let’s just call it a failure which we nonetheless transformed into a meal in time for this edition of IMBB.

Tagged with: +

Sunday, January 29, 2006

IMBB 22 - Udon noodles

.
.

A second IMBB #22 post!!! My first one is here, in case you are wondering.
What is there to say about this dish? Well, it was made using store bought udon noodles, some broth leftover from the pig trotters experiment, bamboo shoots, some dried mushrooms (including a good quantity of wild mushrooms we picked last fall) and a Chinese veggie of which I forgot the name.

Some people are very opinionated about what makes good noodles while others are more interested in the broth or the sauce. I am a broth guy. And as such, I am very careful about the way I season the broth and add flavours. In this case, I didn't have to worry since Fufu prepared the whole thing. The noodles were Japanese but the overall flavours were clearly Chinese. It felt very comforting and took no time to prepare: the perfect lunch!
Tagged with: +

Saturday, January 28, 2006

IMBB 22 - Fettucine with Rapini and Lardons

.
.

I made quite a few noodle dishes recently in preparation for this month’s edition of Is My Blog Burning (IMBB) hosted by Amy of Cooking with Amy. I will start with the easy stuff. Here is a pasta dish that is as easy as it is traditional: fettuccine with lardoons and rapini (or broccoli rabe).

I don’t cook very often with bitter greens. I like the bitterness of coffee and chocolate but less so the bitterness of most vegetables. Still, once in a while, I get tempted by a bunch of dandelion greens, chicory or rapini. I guess this weird behaviour of mine is the grown up version of those of kids who gobble extremely sour candies for the challenge and for the trill of unusual intensity of a primary taste. Well, it is true that some people don’t find rapini to be bitter. As usual, its all a matter of personal perceptions. But I still like to think that eating rapini, at least when you didn’t grow up eating them, can be interesting for culinary thrill seekers.

Ingredients needed:

  • 1 bunch of rapini
  • Unsmoked bacon (pancetta for instance)
  • Olive oil
  • Garlic
  • Fettuccine
  • Dried chilli pepper flakes
  • Salt and pepper

First, clean your rapini. You can, as I did, separate some of the leaves from the tops. It should help you controlling cooking time as leaves cook much faster then the stems. Some people avoid the leaves but I see nothing wrong with them when the flavour I am seeking is on the bitter side.


Secondly, blanch the vegetables in a large pot of boiling water and immediately shock them in cold water so that they keep their superb color. Refill your pot with clean water and salt and put to boil again so that it is ready to cook your pasta.

Thirdly, brown some unsmoked bacon (I used the ‘lardoons’ from my little butchering from a few weeks ago) in some good olive oil in a large pan. Here the olive oil serves more as a flavouring ingredient since bacon does not need any extra fat to cook properly.
.

.

.
Fourthly, add some coarsely chopped garlic to the pan along with some dried chilli pepper flakes. Keep the temperature at medium to avoid burning the garlic. The goal here is to infuse more flavours to the oil and pork fat already in the pan.
.

.

.
Fifthly, add the rapini. Saute them for a few minutes. Make sure that your pasta are ready at this point.

.

.

.

.
Sixthly, transfer the pasta to the pan directly from the pot in which they cooked. This will allow some pasta water to get in the pan hence producing a nice and delicious ‘sauce’.
.

.

.

.
Mix well together, adjust seasoning (salt and pepper) and serve immediately.
.

.

.

.
It is that simple! In fact, most pasta recipe are extremly simple and you can adjust them to your own taste. You don't like rapini? Use broccoli instead. You don't like bacon? Use shrimps or scallops. You can transform recipes like this one in thousands of new and different pasta dishes. Let the ingredients inspire you (motivational guru intonation).

Tagged with: +

Split Pea soup for Sarah Lou

Since Sarah Lou of One Whole Clove talked about split pea soup a few days ago without making one, I thought I should share this picture with all of you. On her blog, Sarah Lou discuss amply this delicious soup so I won't go in details here. I made the more traiditonal version using a ham bone to add flavour to the soup instead of sausage.

Friday, January 27, 2006

The Garlic Test

Over the last months, I have tried a variety of garlic bulbs in my kitchen in order to determine which type to buy in the future. The results varied from one type to the other but, frankly, I found that while each types of garlic definitely had a different taste, they still all performed well in most recipes.

What I learned over the course of my various experiments however was that freshness was key in term of flavour and aroma. It sounds simple. It is pure common sense. I know, but I was still surpised at how huge the difference can be. The best tasting cloves of garlic deteriorated extremely fast while the cheapest imports (those with a fairly strong sulphuric smell) lasted a bit longer. But even they greatly lost in taste and aroma after a few weeks/months.

My favourite garlic was locally grown and was of the "hard neck" varieties which tend to deteriorate faster then the “soft neck” varieties. As such, my favourite locally grown garlic did not last very long. I also think that because it was locally produced its level of freshness was simply higher at the time of buying hence better tasting.

Now, which type of garlic will I chose next time? I'll probably stick with what is available to me at the grocery store for most of the year but will definitely choose the local varieties when in season. I will also only buy garlic in small quantities so that we always have the freshest garlic possible at home. Common sense applies here.

Wednesday, January 25, 2006

Pig trotters - pied de cochon

.
.


I am reading many blogs these days and some of them are extremely inspiring. Recently, Brett discussed his recent experiment with pig trotters on his excellent blog: In Praise of Sardines. If for some weird reason you haven’t been there yet, go have a look now. You must admit that Brett knows how to attract his reader’s interest. As for myself, I totally fell for his version of Thomas Keller’s pig trotters’ recipe. I just had to replicate it… at least in my own way.

I had pig trotters before but they were presented to me whole and I had to eat those delicacies cave men style. I usually enjoy the simple joy of eating with my hands and getting messy but pig trotters are just impossible to eat decently even alone in a dark cave. When I saw the simple hockey puck presentation on In Praise of Sardines, I was simply amazed at how uncomplicated a solution to the usual sticky muckiness of pig trotters this was. In my mind, it also solved another problem that I associate with pig trotters: the fact that when eating them whole, you generally eat one part at the time; either you eat the skin, a tendon, some meat or that delicious slime surrounding the bones.

After reading Brett’s post, I knew I just had to cook pied de cochon. Fufu bought me a nice rear leg pig trotter at a local Chinese grocery store and I started working on my dish almost immediately. I pretty much followed the exact steps mentioned on In Praise of Sardines but let me recapitulate them for you here.

  1. Prepare your pig feet by washing them well and cutting them if necessary. I had to cut mine in two sections so that it could fit in my pot. A large chunk of shank was left on it providing a meatier piece than the foot itself.
  2. Boil your pig feet in water for a few minutes and discard the water.
  3. Place them back in cold water along with some aromatic vegetables of your choice. I personally opted for the usual celery, carrots and onion along with a bouquet garni (thyme, laurel and leek) a few juniper berries and a few cloves.
  4. Simmer for 3 hours. Drain the broth and keep it for another use (we have been using it for a few quick soups).
  5. Remove the skin, the meat, the gelatine and the tendons from the bones.
  6. Roughly chop the meat, gelatine and tendons together. Add chopped skin in a ratio of about 50% of the amount of meat, gelatine and tendons.
  7. Mix in a bowl adding cooked chopped shallots, some Dijon mustard, salt and pepper. To give the dish a fresher taste, I also added minced parsley stems to this combination of ingredients.
  8. Place the mixture in circular moulds and refrigerate; in a few hours, the gelatine will set and the hockey puck will be much easier to work with. I do not own any circular moulds so I used cookie cutters and a few empty tin cans that were opened on both sides.
  9. At this point, you can add bread crumbs and Dijon mustard on the top along with some chopped parsley (I am one of those weirdos who happen to love parsley but feel free to use other herbs of your liking)
  10. While Brett pan fried his pig trotter ‘pucks’, I decided to bake mine for a few minutes before placing them under broil to partly char the surface.


I served this dish with home made pickles and a quick relish made with chopped pickles, tomato concasse, anchovies, mustard and a touch of olive oil and sherry vinegar. Fufu, who is used to the Chinese version of pig trotters, loved this version and my guests that night seemed quite pleased too. As for myself, I am glad I served these as appetizers because although delicious this dish remains a bit on the heavy side. Much of that buttery mouth feel is caused by gelatine, not only fat, but after a whole puck I think it is time to move to something lighter and crunchy: a salad for instance.

Now the big question… would I cook it again? Absolutely! But again, I will serve it in small portions along with acidic ingredients (pickles, mustard, capers…). Serving wine with this dish could be a challenge and I am no expert here but I would opt for a fairly acidic and crisp white wine (e.g. a dry Riesling) but frankly a cold beer might work even better. Since I will almost certainly prepare pig trotters again in the future, I am open to suggestions as to how to prepare and serve them as well as to what beverage would best help the diners clean their mouth of the delicious unctuous tastes emanating from this dish.

Tuesday, January 24, 2006

A steak diner for our new prime minister Mr. Stephen Harper

.
.


Yesterday was Election Day in Canada and a new prime minister was elected: conservative leader Stephen Harper. His party will form a new minority government replacing the Liberals who suffered greatly from a series of scandals. In honour of our new prime minister (even though I am personally a bit afraid of seeing Canada taking a conservative turn) I offer you this steak cooked just a few days ago.

This fairly new conservative party has its roots in Albertan cowboy country although it has now gained a certain pan-Canadian recognition during the last campaign. This is why I chose to honour Mr. Harper with a steak diner. Steaks usually come from expensive cuts of beef which some will be able to afford more often after the promised tax cuts. At the same time, however, it is a fairly traditional, down to earth and, at times, maybe a little bit boring meal, which is, as far as I am concerned, at the image of the conservatives and their leader.

So here is your diner Mr. Harper. Congratulation on your victory. Although you would probably have prefered a majority, there are many reason for you to be proud and to celebrate.

I’m sorry there is no dessert. Since I badly lost my election (let’s just say that I didn’t vote liberal either), I can’t offer much more love to you right now Mr. Harper. It's better for your health anyway. However, I promise that if you come to eat at my table to chat politics and maybe calm my anxieties about some of your proposed policies I'll bake you something nice and sweet. My home is quite humble but I don't live that far from 24 Sussex drive.

By the way, you can recognise the mushroom broth used for my ravioli which has been transformed into a sauce and the gnocchi which were meant to accompany the steak.

Monday, January 23, 2006

Potato gnocchi

.

I have been thinking about making gnocchi for years but never took the time to actually make any. I made all kind of noodles and dumplings including ravioli, spaetzle, and linguine. Gnocchi are fairly simple to make and last Saturday was gnocchi day.

Here’s the recipe we followed:

4 medium baked russet potatoes
2 eggs
About 1.5 cup of flour
Salt

Mash the potatoes.
Add the eggs and the salt.
Add enough flour so that the dough stop being sticky but remains supple.
Knead for a few minutes.
Roll into long cylinders.
Cut in small section and, if you like, make ribs using a fork.

We served them with a home made pesto sauce that was sitting in the freezer for a bit too long but the resulting dish was still really good. Reheated, the gnocchi were really not as good so next time we will make smaller quantities.

Use your leftovers: asparagus soup

We all hate to waste food right? Here's a trick to help you use the hard and fibrous part of asparagus.

Cook them in water with a bit of rice. Purée everything in a blender. You can also add a few leaves of spinach in the blender to add colour. Pass the mixture through a sieve to remove the fibres. Season. And voila: asparagus soup!


You can use the same recipe for many other vegetables such as wilted lettuce or broccoli stems.

Sunday, January 22, 2006

Miso crusted salmon

.


I know that I wrote in my previous post that I suck at cooking fish. One of the exceptions to that rule is salmon. The fact is that with its high level of fat it is quite resistant to long cooking time (for a fish at least) and if you are undercooking it, it can still taste awesome. Salmon is a very forgiving fish.

Two days ago, having very little time to cook, I simply applied a mixture made of an aged dark barley miso, maple syrup, water and lemon juice to a filet of salmon and baked it for a few minutes before putting it under the broiler. The result was delicious although I admit to putting too much of this otherwise delicious glaze on the salmon. Marinating the fish for an hour or so might also help.


We served it with a red pepper and zucchinis (cut in long strips with a mandolin) sauté which I generously seasoned with black pepper. I generally think zucchinis and black pepper form a perfect match but this time their flavour clashed with those from the fish. I'll have to think of a better way to serve this miso crusted salmon next time. And yes, the lemon wedges do look silly but a bit of sourness helps cutting through the saltiness of the miso and the richness of the salmon.

Saturday, January 21, 2006

Monfish with roasted vegetables in creamy curry sauce

.

I'm trying to eat more fish. The problem is that I generally suck at cooking fish. This time however, the result was more than acceptable although I still feel that I could have done better.

I first prepared a sauce using cooked ginger and carrots, a few slices of red pepper as well as chopped shallot. I simply placed all these ingredients in my blender along with cooking cream, srimps, garlic and some spices (curry powder among other things). The sauce was very nice; I could make a soup with it by diluting it slightly with water.


I also oven roasted the rest of my red pepper along with a bulb of fennel cut in quarters. This never fails and the vegetables were also quite good too.

Then came the monkfish filet. I fist pan fried it on medium heat and finished cooking it in the oven. This is where I should strive to improve next time. The problems were as follow:
  • I did not remove a small transparent membrane on the fish which shrank under heat deforming slightly the filet. This membrane did not taste very good anyway.
  • I should have cooked the fish at a much higher temperature or under the broiler. I think monkfish can withstand higher temperature and could develop a nice golden brown crust… or even char marks from the grill.
  • A bowl is really not the right place to put large chunks of fish and vegetables; the rim makes it almost impossible to cut them.

As you can see on the picture, it was served with shrimps cooked in garlic and olive oil... another never-fail-recipe!

Friday, January 20, 2006

The perfect weekend breakfast

.


I often make French toasts on the weekend and Fufu generally cuts tons of fruits to go with them. The caster sugar can look a bit chichi but I love the added sweetness of that adorable melting powder.

It is always a good thing to remember that you can add flavour to your French toasts: orange zest, almond or vanilla extract... even cognac or calvados if you like!

Not all is wrong

.

I just wrote about how bad my ravioli dough was but not everything turned bad that night. Using what was left from my egg wash and ravioli dough along with some of the broth I made for the ravioli, I prepared that simple egg drop soup. I changed the flavour of the broth slightly by adding soy sauce and sesame oil; added some cooked noodles made with the dough; dropped the egg wash in the hot liquid; and served it with chopped scallion. Fufu, who didn't feel too well that night was extremely pleased and revitalized by this soup.

Recipe for disaster – Ravioli with mushroom and cheese stuffing

Ok! I admit… I sometimes cook very VERY stupidly.


I admit… I did not look for any recipe or try to learn something about pasta before attempting this dish.

The result? Well let’s say that while some parts of the dish were excellent, the texture and even the overall flavour were wrong. And I worked hours to produce that deceiving meal. Let me explain what happened.

A few days ago, I decided that I wanted to make mushroom and cheese ravioli and serve them in a mushroom broth. I thought this would be simple but I was wrong. Well no... it is simple... but I cooked like an idiot.

The stuffing and the broth were excellent. The stuffing was made from a mushroom duxelle, polish sausage, a few vegetables, chive, parsley, parmesan and ricotta cheese. You know the kind of flavours that can’t go wrong together. The broth was made with a simple mirepoix (celery, carrot and onion) some bones I had in the freezer (rabbit and lamb) a few herbs (parlsey, bay and thyme) as well as some of the delicious dried mushrooms from my fall foraging in the forests near my home (porcini, yellow footed chanterelles and a few other agarics). I also added a bit of balsamic vinegar to adjust the flavour at the end. It tasted very good, the flavour from the lamb was perceptible but at a very subtle level… it would have made a delicious sauce.

Where was the problem you ask me? The problem was that I made my pasta dough blindly. I knew most pasta dough recipes include both normal flour as well as semolina flour so I made mine using these two types of flour along with eggs and a little bit of water. What I learned after diner when doing some research on what went wrong was that while semolina flour, added in small quantity in pasta dough, gives a nice bite to pasta it can also make it grainy, almost sandy, when added in too large quantities. For ravioli, I feel that the finer the texture of the pasta the better is the final result. My dough had about equal amounts of normal flour and semolina flour; and this is simply wrong. On top of that, I rolled it too thick which resulted in the opposite of the fine and delicate ravioli wrapping I had in mind. My dough could have been ok in a lasagna but it was terrible for my ravioli.

Lesson learned:

  • Spaghetti dough and ravioli dough are not the same.
  • I'll use OO flour or fine bread flour to make ravioli wrapping next time.
  • I should also roll the dough relatively thin. Position #4 on my pasta machine is way too thick.
  • Alternatively, I could just stick to dumpling or spring roll wrappers. They are cheap, widely available and work very well.

Wednesday, January 18, 2006

Recette d'avant Noël: Marrons glacés faits à tâtons

.


This post is written in French in part because it was inspired by a posts made on many French blogs before the holidays. Feel free to comment in English, Spanish, Portuguese or Mandarin.

Voilà déjà plusieurs semaines que je n’ai rien écrit en français sur ce blog et ce même si je me sens souvent plus à l’aise en français qu’en anglais. Comme je l’ai déjà expliqué, c’est qu’à la maison ma conjointe et moi parlons l’anglais ensemble et que j’aime bien avoir ses commentaires comme ceux de mes amis anglophones. Mais la raison principale pour laquelle j’écris ce billet en français tient au fait qu’il a été inspiré de recettes de marrons glacés trouvées sur plusieurs blogs francophones européens avant les fêtes. Cela fait déjà près d’un mois que mon aventure avec les marrons glacés a commencé mais je n’avais pas encore pris le temps de mettre mes idées à l’endroit; c’est que, comme vous allez le voir, il s’agit d’une histoire un peu compliquée.

Quand j’ai vu les recettes de marrons glacés, sur plus d’une dizaine de blogs différents, je me suis tout de suite dit qu’il s’agissait d’une tradition de Noël qui n’avait pas encore vraiment su traverser l’Atlantique. J’ai bien vu quelques boîtes de marrons glacés importées dans quelques épiceries spécialisées mais comme elles étaient toutes trop chères je n’ai pas pu assouvir ma curiosité. Par contre, les marrons frais étant disponibles à bon prix, j’ai décidé de me lancer dans la fabrication de marrons glacés à la maison. La plupart des recettes que j’ai trouvées demandaient l’achat de marrons précuits qui ne sont pas disponibles, du moins à ce que je sache, sur le marché Canadien; il fallait donc les éplucher et les faire cuire.

Pour l’épluchage, rien de plus facile me suis-je dis. Il faut simplement les ébouillanter ou les mettre au four et enlever l’écorce. J’ai bien vite appris que d’éplucher quelques marrons ça peut toujours aller mais en faire un bol complet ça fait mal aux mains. J’ai pris plus de 2 heures pour terminer l’opération sur le gros sac de marrons que j’avais acheté. Mes mains étaient à moitiés brûlées, les doigts affaiblis par le long travail et la peau ridée par l’eau et éraflée un peu partout par les écailles souvent pointues. C’était dur mais j’étais fier de moi après cette pénible corvée. J’avais maintenant un gros bol plein de marrons épluchés.


L’étape suivante : la cuisson. Je n’ai jamais vraiment cuisiné avec des marrons. Ce n’est pas un ingrédient très utilisé ici et quand on en utilise il s’agit souvent de marrons en boîtes de conserve. Je ne savais donc pas à quel point la cuisson devait être délicate. Je l’avais bien lu mais je ne croyais pas qu’il s’agissait d’un ingrédient aussi fragile. Comme plusieurs des marrons étaient fragilisés par les coups de couteaux en croix fait pour aider l’épluchage, plusieurs ont fendu ou se sont carrément émietté lors de la cuisson. L’eau frémissait à peine, pas de gros bouillons, mais c’était quand même trop pour mes pauvres marrons. J’en ai quand même récupéré une bonne quantité et j’ai fait de la purée de marron avec le reste. Cette purée a par la suite été utilisée dans quelques recettes dont ce soufflé.

Les étapes suivantes étaient moins pénibles. Il fallait simplement couvrir les marrons d’un sirop à chaque jour de plus en plus concentré et pendant trois ou quatre jours. J’ai ajouté un peu des couleurs locales à mes marrons en utilisant un peu de sirop d’érable.

Après ces quelques jours, il ne restait qu’à glacer les marrons avec un mélange du sirop et de sucre à glacer et à les placer au four quelques minutes pour fixer cette ‘glace’.

Le résultat était visuellement plutôt bien mais j’étais un peu déçu de la texture. Mes marrons étaient un peu plus dur que je ne croyais qu’il serait mais comme je n’avais aucun point de référence je me suis dit que ça irait.

Je les ai tous placé dans une boîte et ils ont fait le voyage avec moi dans ma famille pour les fêtes. Le voyage a été dur pour eux et ils ont sans doute eut un peu chaud car une partie du glaçage avait fondu à mon arrivée. Au cours des jours suivant, le reste du glaçage a aussi disparu. C’était un peu décevant puisque je voulais en offrir pour Noël et le nouvel an. Le pire dans tout ça c’est qu’autour de la première semaine de 2006, ils avaient commencé à moisir et plusieurs ont ainsi terminé leur vie à la poubelle. J’ai peut-être raté la recette sans le savoir ou peut-être est-ce que je n’ai pas su les emballer correctement… une chose est certaine, ça ne valait pas l’effort mis… l’an prochain soit je me trouve quelqu’un pour me montrer comment faire soit je m’en tient aux biscuits!

Tuesday, January 17, 2006

Variation on a family recipe: whole wheat banana bread with cranberries

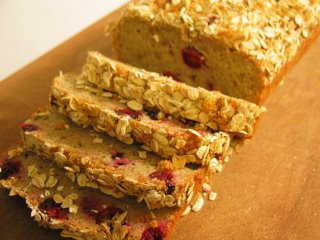
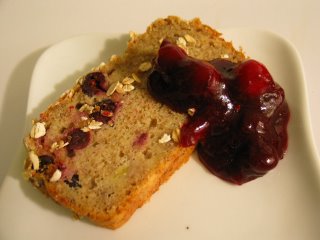
My mom once gave me her banana bread recipe and since then this is how I use the bananas that get too dark and mushy to be eaten as is. And for years, it has been the only baking I have done. I don’t know where my mom got the recipe in the first place, it might come from a magazine or a book, but the important thing is that it works all the time. Over the years however, I have developed many variations using ingredients that were sitting on my cupboard: coconut and pineapple banana bread, lemon banana bread, chocolate chip banana bread, etc. And last weekend, it is fresh cranberries that I added to my loaf.

The recipe is extremely simple and never fails.

Ingredients:

  • 1 ½ cup of flour (I now use whole wheat flour)
  • 2 tea spoon of baking powder
  • 1 tea spoon of salt
  • ¼ cup of sugar
  • 2 eggs
  • 1/3 cup of vegetable oil
  • 1/3 cup of corn syrup
  • 1 cup of crushed ripe bananas (about 2 or 3 bananas)
  • ½ cup of chopped nuts (optional)


Mix the flour, baking powder, salt and sugar together. In another bowl, mix all the other ingredients. Combine the dry and the liquid mixtures. When everything looks wet (do not over-mix), pour everything in a greased cake tin and cook for about one hour at 350F.


In my last version, I replaced the nuts for cranberries and added some oatmeal flakes and brown sugar on the dough to make a nice crust. I served it with a cranberry sauce made using the leftover cranberries.

Sunday, January 15, 2006

Citrus and herbs pork roast

It's the Some Pig Blogging Weekend event! Have a look here and there.

As mentioned in a previous post, I had a large piece of pork to play with in the kitchen from which I was able to get, among other things, a nice pork roast.

Since citrus fruits are now abundant, affordable and good, I thought it would be a great idea to infuse their flavour to my roast. And since parsley and coriander goes so well with citrus fruits, I have decided to stuff the roast with all of these flavours before immersing it in a citrus juices marinade.

1. Make the stuffing using
· The zest of one lemon, one orange and one lime
· A good handful of chopped parsley
· A bout a teaspoon of cracked coriander seeds
· Garlic
· Salt and pepper
· A zip of sherry vinegar and olive oil

2. Open the pork roast with a sharp knife and spread the stuffing on the opened surface. Roll it back into shape and, using kitchen twine, tie the roast so that everything stays in place for the next operations.

3. Make a marinade using:
· The juice of one lemon, one orange and one lime
· A few drops of sherry vinegar
· Olive oil
· A few drops of Worcestershire sauce
· Hot sauce
· Salt and pepper

4. Marinate the pork for four to six hours in the refrigerator.

5. Pat dry the roast and sear it well on all side in a pan. Place in the oven at a relatively low heat (e.g. 300ºF) until cooked to the desired doneness (e.g. medium).

The result was quite good but I think the addition of a bit of wine to the marinade would somewhat improve the recipe. We served it with baby potatoes and broccoli (you can’t have more traditional accompaniments for a roast).