Tuesday, June 10, 2008

Rhubard pie


Rhubarb is one of the easiest things to grow in a garden and, once established, it provides you with delicious tart stems. I have seen recipes using rhubarb in savory dishes as a vegetable or souring agent but most of the time people use rhubarb for dessert applications. My all time favorite use of these red and green stems is the humble rhubarb pie, sometimes with the help of that other spring fruit delicacy: the strawberry.

My recipe is simple: line a large baking dish with your favorite pie dough, cover with chunks of rhubarb, dust with lots of sugar, cut strips of dough and weave them to make a pretty top crust, brush with egg wash, dust with a bit more sugar and bake for about 45 minutes in a medium oven (e.g. 375º). It is so easy that I do not feel I have to measure my ingredients or worry too much about cooking time. The worst thing that can happen is that your pie turns out to be too sour, in which case a dusting of icing sugar or a melting scoop of ice cream can make wonders, or that it is too sweet, in which case the addition of cream will help while adding decadence to an already wonderful dish.

For those wishing follow recipes a bit more closely or to learn more about rhubarb, from its place in history to tips on growing your own, have a look at the Rhubarb Compendium. It is a fabulous website, every fruit and vegetable should have a similarly informative page on the web.

Food 2.0 by Charlie Ayers - A review


Once in a while I receive review copies of books soon to be published. Although I am not always excited these books, it remains a great way to discover authors and books that I would not have sought otherwise. I recently received Food 2.0 from famed Google chef Charlie Ayers and what a treat it was!

Now, I really loved the book but perhaps not in the way Charlie Ayers and its publishers would have anticipated. In fact, I would even argue that the recipes, although some are truly mouth watering, are not particularly novel nor exceptionally well researched and presented. What makes this book so interesting is the fact that it perfectly encapsulate an era in food in the United States in particular and the western world in general.

I certainly do not want to ridicule the book or its content; in fact it is an excellent opinionated read with useful ideas and recipes for busy people wanting to eat well in a world of over processed and unhealthy food. As a matter of fact, it is probably one of very few books on fast healthy cooking that is worth reading; so much of what is available these days in that category is of very poor quality. One could certainly question the need to be told, once again, what to eat or the need for so much smoothie and salad recipes but let’s admit it: this is exactly what many of us have been eating on a daily basis over the last years.

The design of the book is also typical of a certain style of graphic design that for good or bad reasons I associate with the dot-com era and trendy kids wearing large black plastic frame glasses and harboring irregular and colorful hairdos.

If anything, food is deeply engrained in culture. If this is something well accepted on a geographical scale, it can also provide good evidences for generational cultural divides. One just need to think of post-war food in North America with its multilayered Jell’Os, Pillsbury cookies and TV dinners to understand how the economic and cultural factors of an era shape the food we eat. If the massive incorporation of women in the workforce and the new economic growth of the post-war era impacted the food choices made by families through a crush in the time available to prepare meals and the increased availability of convenience food in the 1950’s, today the fast pace and lengthy work days of project driven dot-com workers along with rising concerns for health and the environment certainly impact contemporary food choices and contribute to this generation’s food culture.

Given the cultural significance of Google in terms of business model, hotbed for innovations and magnet for young forward-looking professionals, it is no surprise that a talented chef like Charlie Ayers was able to grasp the era so well even if unknowingly. After all, food is an exciting cultural marker in ways that are very similar to pop music and fashion.

As for the recipes themselves, they are a bit too much on the fast-eat side to my taste. I like smoothies, salads and sandwiches but do not really need recipes to prepare them, what guides me is the content of my fridge or the availability of fresh ingredients in the grocery store. The text and illustrations in the book are a great source of inspiration however, and that hot sauce recipe is on top of my list of things to cook.

All in all, Food 2.0 is an excellent read, at least for its anthropological value. In 30 years, we will look at this book for the window it provides on the Silicon Valley era in food and lifestyle, probably with a bit of nostalgia.

Thursday, May 01, 2008

Morel season


After a very long winter at least here in the very north of the northern hemisphere, spring has finally arrived!

This can only mean one thing: restaurant all over will feature morels, fiddlehead ferns and ramps. These spring delights all come from the wild giving them an elusive aura that is not necessarily warranted, at least if you enjoy walking in the woods. It is my contention that such wild seasonal ingredients give more pleasure to the forager than to the diner even though they are truly delicious in themselves (with the possible exception of fiddleheads, but Fufu argues otherwise).

Take the morel as an example. As you walk leisurely in the woods, you slowly build up an appetite. Then when you find a few morels you develop some pride in your finding. And finally, as your basket fills up, you anticipate and salivate at the thought of the dinner ahead. When you finally arrive at home, you know, from the smell of the wet soil stuck under your sole and from the excitement of family members and friends looking at the brain like mushrooms that no matter how bad you a cook you might be, your morel experience will be remembered as a great success.


The fact is that a simple walk in the woods can become a wonderful treasure hunt where luck, knowledge, experience and good eyesight all contribute to success in various ways. On bright spring days, the worse that can happen is a short detour to the supermarket to buy button mushrooms or, with a bit of luck, some fresh or dried morels that can compensate for an unfruitful hunt.

To avoid such unfortunate last minute detours, here’s a few hints to help you in your morel hunt this year:

1.) The season

The two type of morels that fructify under Canadian climates are the yellow and black morels or morchella esculenta and morchella elata respectively. When considering the two species, the morel season last at least 4 weeks with the black morels fructifying about a week earlier than the yellow morel. In general, the Victoria day weekend mark the peak of the season but the season truly begin and end with the month of May in southern Ontario and Québec, sometimes extending to early June. Some cynical people suggest that morels pop out of the ground when the mosquitoes season begins others, more romantic, say that the peak of the trillium season is a better indicator.

2.) Where to find them

Around Ottawa, I found a lot of yellow morels under poplar trees and black morels under spruce and fir trees. In other areas, helm trees are said to be a great host. Most morels grow on disturbed terrain where the sun shines once in a while. As such, it is a good idea to stick to trails… it is just more enjoyable to avoid branches and difficult terrain anyway. Take a closer look at places where trees have been cut down and when you find one, look around. Once you spot a morel, chances are that more will be found not too far. And do not forget to take note for the next season since morels tend to grow back in the same area year after year. As a matter of fact, knowing where morels have been growing in the past is the best clue as to where they will grow in the near future.

3.) Take your time

Morels are notorious for how well they camouflage on almost any type of forest groundcover from dead leaves to branches and needles. Once you have spotted a few morels, your ability to find them will develop and you should be able to cover larger areas in less time.


Beware of the false morels

There are a number of other beautiful spring mushrooms resembling the morel which can cause stomach upsets and even death when consumed in large doses. These mushrooms are either verpas or gyromitras and are often abundant during the morel season. Get yourself a good identification guide and you should have no problems safely identifying these mushrooms. One of the best thing to keep in mind is that the morel’s stem is hollow while the gyromitra’s stem tends to be full. Learning to differentiate between gyromitra and morel is easy and fear should not detract you from the pleasures of morel hunting. Here’s a great page which can help you differentiate gyromitras from morels. Verpas are harder to distinguish from morels but constitute less of a problem in terms of toxicity. Unlike the morel, verpas’ caps are not attached to the stem and are ‘wrinkled’ as opposed to the ‘pitted’ ones of the morels.

Cooking with morels

(foie gras with ramps and morels)

What many people do not know is that raw morel is slightly toxic as well. Cooking fortunately destroys the toxin and generally improves the gustative quality of the mushroom. However, unlike other mushrooms such as button mushrooms or chanterelles, morels are quite fragile and will not necessarily benefit from very high heat or prolonged cooking. Cook them like you would garlic: a slight sauté followed by a short stewing if needed, do not burn them.

Morels are mostly appreciated for their aromatic qualities which, in my opinion, resemble truffle. A good cook will therefore insure that such wonderful aroma is preserved by avoiding extended cooking or strong conflicting smells (chocolate coated morel someone?).

More than any other mushrooms, morels like cream and butter and perform splendidly in sauces. Cream sauce and butter sauce are easy successes (see my morel beurre blanc recipe here). Experienced cooks should also be able to produce very fine reduction sauces as long as they do not go too heavy on strong red wine or other flavoring ingredients.


Morels can also be used for their tremendous beauty on a plate in a spring vegetable ragout or simply as a garnish. Some people even exploit the hollow interior of the morels by stuffing the mushrooms. In fact morels can be quite versatile as long as you keep in mind its essential qualities: the aroma and its delicate nature.


I once made pizza with morels but the results were a disappointment. The delicate flavor of the mushroom did not hold up to the stronger flavor of the otherwise delicious slightly burnt crust and only found a poor support in the crust and cheese. Some people deep fry morels coated in different types of batter, I have to say that I am afraid of such recipes even though they seem extremely popular.


Even deep fried morels and weird morel pizza can be a success however when you pick your own mushrooms since half of the pleasure consist in the hunt itself and that after half a day in the woods, anyone is hungry enough to enjoy even a bland pizza or a deep fried lump of dough and has plenty of story to tell to make the dinner a memorable one.

Sunday, April 13, 2008

Kitchen Gardening


Last summer, Fufu and I bought a house with a fairly large backyard. There, you could find a few large wooden boxes where semi-abandoned vegetables were still growing among the weeds: asparagus, peppers, tomatoes and squashes. Even though the garden was in poor shape, we nonetheless enjoyed what could be salvaged from it. Our then less than 6 months old son even tasted his first vegetables directly in the garden with surprising delight. A berry patch, further away, also provided us with a few late raspberries and two apple trees, on the front yard, offered us a bounty of delicious fruits latter in the fall.

A survey of the property confirmed the presence of many perennial herbs including an overabundance of mint as well as a few other surprises: rhubarb, strawberries, cherries and grapes. We knew that with a little bit of work we could turn the place into our own little garden of Eden. After painstakingly removing the weeds in the existing boxes, we built a few more beds, expanded the area devoted to growing raspberries and blackberries, planted about 10 blueberry bushes, 2 gooseberry bushes, 2 black currant bushes, 2 pear trees and 2 plum trees and started to make plans for the next season.

This winter has been exceptionally long and record amounts of snow buried everything. Now, that spring is finally setting in, we just can’t hide our excitement. We already started our seedling for the next season: 6 kinds of tomatoes, 10 of chili and peppers, 4 types of onions, 2 of eggplants, etc. We even decided to try plants that normally require a much warmer climate and longer growing season such as artichoke. We will see what work and what does not but we have high hopes for harvest season.

Since I see my gardening efforts as being an extension of my culinary education, I hope to post a few updates on my gardening adventures on this blog over the course of the growing season and I welcome any comments regarding the cultivation of fruits and vegetables.

Thursday, April 10, 2008

Eating bones

Everyone knows that bones are what give a stock its body and richness which in the hands of a skillful cook can turn into lip smacking sauces. The delicious gelatin extracted from bones through a long simmer is what most people are longing for when cooking bones; the marrow probably comes as a close second, particularly in dishes like osso bucco or a bordelaise sauce.

Bone marrow is deliciously fat in a way that can be reminiscent of foie gras or butter.
This, of course, means that we should not eat too much of it if we want to stay minimally fit which is not too difficult since it is getting harder and harder to find.

In my opinion, bone marrow is better when very fresh, unlike most red meat which generally tend to get better when aged properly. The most available and best source of marrow will come from leg bones. Veal and beef are the usual source of bone marrow but lamb, goat, and any largish animal should not be dismissed.

To extract bone marrow, for a bordelaise sauce for instance, you either need to ask your butcher to split the bones lengthwise or poach sections of the bones for a few minutes until you can poke the marrow out with your fingers.

Another easy and extremely popular way of eating bone marrow, thanks to Fergus Henderson, consists of roasting marrow bones upright for a few minutes (15-20 minutes at 375 degrees). The nose-to-tail eating chef would serve the bones with toasts and parsley salad but you can certainly try mashed potatoes and pickles if this is what you have at hand. My only attempt so far followed Henderson’s indications religiously and was delicious.

This very recipe even found its way to the front page of Jennifer McLagan’s excellent book: Bones: Recipes, History, and Lore.

You can find Fergus Henderson’s recipe here.

Tuesday, June 05, 2007

Poulet au romarin - Rosemary chicken

This post is written in both French (blue) and English (pink).

Ce message est écrit en français (bleu) ainsi qu'en anglais (rose).


Un poulet complet, ce n'est pas si facile à cuire. La viande blanche de la poitrine cuit plus rapidement que la viande brune des cuisses, la peau doit être croustillante sans être brûlée et l'assaisonnement doit être assez costaud pour atteindre le centre sans pour autant masquer la saveur délicate de la chair. Déjà que les poulets que l'on retrouve presque partout ont peu de goût... si en plus ils sont difficile à cuisiner, ça va mal! J'ai déjà discutté du peu de goût des poulets industriels ici et Kate (the Accidental Hedonist) et ses lecteurs ont su partager leurs connaissances sur le sujet ... donc je m'en tiendrai à la cuisine aujourd'hui.

Une façon facile et bien connue de ne jamais rater son poulet rôti c'est de n'utiliser que les hauts de cuisses, de les badigeonner d'un peu d'huile pour aider la peau à dorer et devenir croustillante, d'y ajouter sel et assaisonement et de les faire cuire dans un four très chaud. Une de mes recettes préférées, consiste simplement à assaisoner les hauts de cuisses avec du romarin, du sel et de l'huile d'olive... rien d'autre, même pas de poivre. J'ai quasiment honte de discutter d'une recette aussi simple ici mais c'est un peu cette simplicité qui donne tout son charme à cette recette.


It is particularly difficult to roast a whole chicken. The white meat from the breast cooks faster than the darker meat from the legs, the skin has to be crispy without burning and seasoning has to be strong enough to reach the interior of the bird without overpowering the delicate flavour of the flesh. Chickens that we find in most grocery stores are already tasteless... if cooking them is complicated, things are doing looking very well! I already discussed the lack of flavour of industrial chicken here and Kate (the Accidental Hedonist) and her readers shared their knowledge on the subject over there... I will therefore stick to cooking today.


An easy and well known method to roast chicken which never fails consist in using only the thighs, rubbing a bit of oil to help crisp the skin to a beautiful golden brown color, adding salt and spices and roast in a very hot oven. One of my favorite simple recipe consist in seasoning chicken thighs with salt, rosemary and olive oil, nothing else, not even pepper. I am almost ashamed to discuss this overly simple recipe here but it is through such simplicity that this recipe develops all its charms.

Sunday, June 03, 2007

Eggplant crisps

Sometimes, a recipe calls for peeled eggplants which leaves you with a pile of eggplant peels. One easy way to put what would otherwise go to waste is to make eggplant crisps. They can be eaten as is or used as garnish. I generally tend to prefer this last option for the stunning crispy darkness these crisps can provide to almost any dish.


The process is very simple.

1) Cut the peels in fine strips (I tried slices and it does not look as good)
2) Add a little bit of oil (I like olive oil)
3) Bake in the oven until crispy but not burnt (time varies according to the thickness of the peels)


This can be done at different oven temperatures which allows you to make them as something else is cooking. It generally takes only a few minutes but you should always keep an eye on them as thin vegetables tend to burn quite fast.


If you like eggplant caviar or baba gannouj, preserve the skin to make these crisps. They are great with fish.

Saturday, May 26, 2007

Smelt!

Smelts are bountiful in the Great Lakes and the spring fishing season is well underway if not close to the end. Unlike their sea counterparts, river smelts are often full of delicious eggs and, for that matter, eating them whole still with guts and bones is a rare delicacy. I had to travel to Japan to discover how great these little fishes (shishamo) are, especially when eaten with beer. We had them grilled with a bit salt and presented simply on small plates; no dressing, no sauces... just delicious small fishes still full of their own roe.


As soon as we were back in Canada, we had to recreate this dish. Since fresh river smelts are available in season and frozen ones for a slightly longer period, it was an easy task. In fact, all you need is a handful of smelts, a good pinch of salt, a little bit of oil and a grill. Once on the grill, they cook in no time. As such, for a bit of color use a strong heat and a little oil to develop some color on the skin. Serve them hot, ideally outside, with a cold light beer... then fall of your chair upon realizing how good this is.


Sunday, May 20, 2007

The part I did not show

On my last post, I kept quiet on the fact that only one of the plates looked they way it was intended to look like. I completely failed to unmold one of my flan. I learned a valuable lesson: placing a plate on top of the mold and shaking the whole thing will only create disasters when dealing with delicate food items. To unmold properly, you have to use a sharp object to free the flan from the sides and gently let some air get to the bottom of the mold otherwise the suction will simply be too strong and the flan will break in pieces. A hard learned lesson... particularly considering the fact that I was stressed by the outcome of my food that night!

It still tasted very good and at least my partner had a nice dish in front of her.

Lobster, morels and green vegetables flan with morel beurre blanc


The lobster fishing season is in full swing in the eastern part of Quebec (and probably elsewhere on the East Coast) and around here many grocery stores and fish mongers offer this delicious crustacean at a very reasonable price these days. Once considered a cheap source of proteins in many fishing villages, lobster is now widely considered a delicacy and is exported worldwide making it a luxury item for the table even in fishing communities.

As a conscientious costumer, I therefore do not cook or eat lobster very often which makes me a bit nervous when facing the task of preparing a meal out of these dangerous looking creatures. Not that I am one of those compassionate people who are afraid to plunge live lobsters in boiling water... I might actually be a bit cold-blooded and I consider such task to be the easiest part even considering the occasional splash of burning water.

What makes me particularly nervous is the fear of messing up and ending up with a mediocre meal when all are expecting a feast. It is true that simply boiling lobsters and serving them with a variety of melted butters never fails and can be a lot of fun. In fact, this is exactly what Fufu and I did yesterday. Sometimes however there is some excitement in indulging in, for a lack of better words, more “refined” pleasures and these times call for more careful efforts.

I prepared this dish a few months ago for our last Valentine's day without kids still looking for a way to impress Fufu as if we were still on a first date. Although both of us are not very fond of chi-chi presentations, I think the dish was very fitting: delicious and just kitsch enough for a Valentine's day diner.

Essentially, the dish is made of only two recipes: a beurre blanc and a savoury flan. Lobster tails were simply boiled and the broccoli florets steamed, no recipe there. The tomato concassé was a simple last minute garnish. The flan, if I remember it well, was made with broccoli, peas, mint and basil (the same herbs sprinkled around the dish). There are many vegetable flan recipes and the great thing with most of them is that they are all easily adaptable to your taste or to what is available to you at the moment. The key to this one was the addition of herbs to the vegetable puree.

Fufu and I are passionate mushroom hunters and every spring we hunt for morels in the woods around where we live. They should be available in some farmer's markets and specialty stores at this time of the year in most areas. Look for them they are magic and delicious. I am always a bit wary of marrying seafood and mushrooms but morels usually works well with a fish and lobsters. They were particularly good in this dish which relieved me of all the stress of cooking my expensive lobsters... perhaps the flan had something to do with it too.

The beurre blanc included the juices from the morels rehydration which imparted a great aroma to the whole dish. Beurres blancs are simple butter sauces made by using the butter’s capacity to emulsify fats and liquids at a certain temperature (too cold and your butter will remain solid, too hot and it will split). You will find the recipe of my morel beurre blanc bellow.

Morel beurre blanc

Ingredients:

  • 1-2 finely diced shallots
  • 3-6 dried morels
  • ½ cup of white wine
  • 1 stick of butter (cold)
  • 1 quarter of lemon
  • Salt and pepper to taste
  1. Cover the morels with barely enough hot water to cover them for about 20 minutes. This should rehydrate them gently. Reserve the mushrooms and the liquid separately.
  2. In a pan, sweat the shallot with a little bit of butter until they become translucent and add the morels for few minutes, reserve them for garnishing.
  3. Add the white wine to deglaze the pan and reduce by half.
  4. Add the morel juices and reduce again by half.
  5. Lower the heat to a minimum and whisk cubes of butter one after the other until the sauce becomes nice and thick.
  6. Depending on your wine’s acidity, squeeze a little bit of lemon juice to brighten the flavour. Add salt and pepper to taste.
  7. Serve immediately because butter sauces are quite fragile.


You can adapt this recipe to make it more stable by adding a little bit of heavy cream before whisking in the butter. In a pinch, you can also substitute white wine vinegar instead of wine but make sure to reduce it to an almost dry stage before adding the butter to avoid unpleasant levels of acidity.

Enjoy the morel and lobster season!

Wednesday, May 16, 2007

Homemade sauerkraut

I realize that with spring in full swing it is not necessarily the best time of the year to discuss sauerkraut. The fact is that I have been wanting to write about my sauerkraut experiment for months now but my last months have been quite busy for a few reasons chief among that was that I finally found a job and recently became proud father of a beautiful 2 weeks old boy. My parental leave now allows me a little bit more time to spare at the keyboard.


Making sauerkraut is quite straightforward according to what I read on various websites and books: for each 5 pounds of sliced raw cabbage, you need 3 tablespoons of kosher or pickling salt. I looked at dozen of recipes, the ratio almost always remains the same: 5 pounds of cabbage, 3 tablespoons of salt. Since the same ratio is found in almost all recipes, we could believe that one needs to use very strict measurements but since cabbage varies in water content and salt in weight to volume, there is inevitably some leeway in this. In fact, I did see a few outliers such as the ½ cup of kosher salt for 2 ½ pound of cabbage in Lucy Norris’ Pickled or a few potentially dangerous sodium free recipes but these were not the norm at all.


All recipes advise to place the salted cabbage in a non-reactive crock and place a weighted plate on top to press the cabbage down. Eventually, a brine should form from the juice extracted from the cabbage by the salt. If it does not, one can always add salted water to insure that the cabbage is submerged. You then place the whole thing roughly at room temperature or in a cool place (18°C to 24°C according to Harold McGee) for a few weeks to let the fermentation do its magic. This, at least, is the theory!

My first sauerkraut experiment was a bit of disaster. I followed the instruction on the Kitchen Gardeners International website where instruction from Sandor Ellix Katz’ Wild Fermentation had been adapted. After a few weeks of fermentation and skimming of the scum floating at the top of my brine, I had to throw the content of my plastic bucket in the garbage. A very unpleasant smell developed probably from unwelcome yeasts or other micro-organisms… not the ones I was expecting for sure. For some reasons, I kept my sauerkraut nearly two months thinking that the smell would disappear and be replaced by a more fragrant sour aroma. I even tried a few bites of the foul smelling cabbage and while it did turn sour, the stench was just too bad to make a meal out of it. In retrospect, I believe that I should have thrown the whole thing away earlier and I should never have tried to eat it.

Since hundreds and more likely thousands of people use this method successfully, I assume that I have simply been unlucky; that some bad micro-organisms got in before the proper lactic fermentation developed to protect the cabbage. The remedy to this problem is quite simple: protect the brine from ambient air. In my ill equipped kitchen, I simply used a layer of loose plastic wrap to cover my bucket. This was not enough. Some people succeed with no cover at all but I did not and the whole experiment put me off trying this method again.

The next method I tried made good use of many tricks gathered on many website and on an E Gullet forum discussion (link). This time, my goal was to avoid any airborne contamination by creating an almost air-tight cover. A few plastic bags filled with water (ideally with brine in case of leaks) were placed on top of a plate, itself covering a few large outer leaves from the cabbage. The sliced cabbage was also slightly pounded down to help the extraction of the juices.

The result, this time, was great. The sauerkraut was tangy and still crunchy and developed a very nice aroma.

We ate it very simply with boiled potatoes and sausages. I will certainly make more sauerkraut in the fall so if you have any recipe using sauerkraut, please let me know!


The Method

Here's a review of the whole sauerkraut fermentation process, it includes tricks and details from a variety of sources, most mentioned in the above section of this post:

Ingredients:

  • 5 pounds of cabbage
  • 3 Tablespoons of salt


Tools:

  • A sharp knife or a mandolin
  • A non-reactive crock or a food grade plastic bucket
  • One plate slightly smaller than the bucket
  • 3-4 freezer bags
  • Water or brine to fill the bags


  1. Clean all your tools very well and sterilize them if possible.

  2. Core your cabbage and reserve a few of the outer leaves.

  3. Finely shred the remaining cabbage using a sharp knife or a mandolin.

  4. Mix the shredded cabbage and the salt in a large crock or food grade plastic bucket by adding one layer of cabbage at a time followed by a sprinkle of salt. At this point, you can pound the cabbage using your hands or a heavy object in order to help the release of juices.


  5. Place the reserved cabbage leaves on top or the shredded cabbage.


  6. Cover with a plate. Apply as much presure as you can to make sure everything is well packed.


  7. Fill your plastic bags with brine or water and place them on top of the plate. Do not overfill them so that they are still soft enough to close all the gaps.


  8. The next day, make sure the juices extracted from the cabbage cover the cabbage by at least 3 cm or an inch. If more liquid is needed, you can add a brine made by mixing a cup of water with a teaspoon of salt.

  9. Leave at room temperature (bellow 24°C or 75°F) for at least 3 weeks then test it every week until it reaches your desired degree of acidity. If you like a delicate flavor, a three or four weeks is more than enough; if you prefer your sauerkraut on the stronger side, leave it to ferment for up to two months.

  10. In general, placing your sauerkraut in the fridge will stop the fermentation and will keep well if enough acidity was developed beforehand. Some people also can their sauerkraut but the process will necessarily affect the texture.

Wednesday, August 16, 2006

Brie on the BBQ


This is one of Fufu's summer favourite. Most of you already know about baked brie's delicious gooeyness. This version is interesting because the grill adds a little smoky flavour that is very pleasing to this old classic.

First step: add grill marks on the cheese by placing it directly on the BBQ. This takes only a few seconds as the brie crust char very quickly. If you leave your cheese on the grill for too long it will melt and you won’t be able to retrieve it. Be fast and attentive here!

.

The second step consists of wrapping the cheese in grape leaves (or corn husk, or blanched leek, etc.) and using toothpicks to secure everything. This prevents the melted cheese from dripping and makes it possible to handle the cheese when ready. If you choose ingredients carefully, you can add flavour to the dish at this step. Roasted red peppers, for example, can add a very nice touch of sweetness.

After a few minutes on the upper rack f your grill (or on the main grill at a fairly low temperature) the cheese is ready to serve. To enjoy it, simply dip your favourite bread in it and serve with your favourite summer wine.

Talking about bad ideas


For some reasons, I had a lot of really bad ideas in the kitchen recently... and this one was a particularly bad one.

Since I got my BBQ, I am grilling almost every day. Its fun and it keeps the heat outside. But some things are just better when they do not touch the grill. Broccoli is one of these. Grilled broccoli tastes awfully bitter and is truly unpleasant. Don't try this at home.

Blender disaster


Sometimes you think you are brilliant but reality keeps reminding you that your own stupidity is hard to evade.

A few days ago, I decided to make a soup out of the many asparagus stems I kept in the freezer... you know the woody parts of the plant that most of us discard when preparing asparagus? I thought puréeing these to make a soup was a great idea but the only thing I was able to do was breaking my blender. While I was busy doing something else in the kitchen, long asparagus strings blocked the blender blade which in turn destroyed the rubber drive which linked the blade to the motor.

It can be repaired but I really feel silly.

Monday, August 07, 2006

BBQ


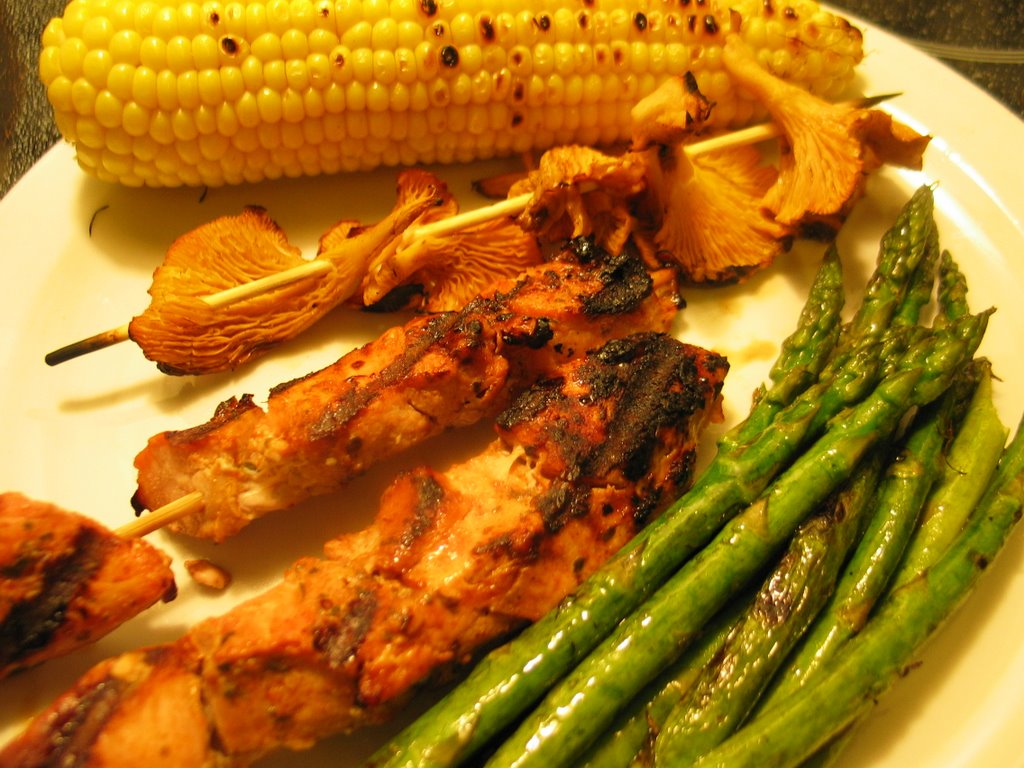
My mom gave me her old gaz BBQ a few weeks ago. BBQ are really nice thing to own! As soon as we received it, Fufu and I went straight to the fridge to find things to grill: corn, asparagus, some ready made pork kebabs and a few chanterelles we picked in the woods. Not all worked well, the chanterelles for instance were not at their best, but we very much enjoyed that very simple meal.

It's so nice to BBQ in the summer: the home stays cool no matter how long you cook ... and grilling while drinking a beer never fails to bring out the man, the real and hairy one, in anyone.

Merci maman!

Wednesday, August 02, 2006

Summer = good tomatoes

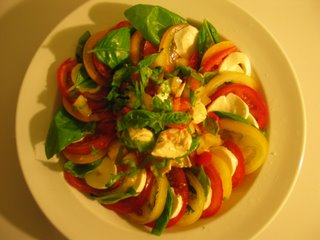
Even with green houses and all the modern food technology available to entrepreneur wishing to make seasons disapear, tomatoes still taste better during the summer months. Its all about the sun I guess... just like for the tomato's best friend: basil.


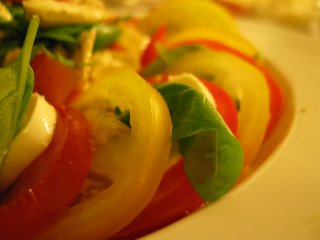
That reminds me of this classic summer salad made of tomatoes, basil leaves and mozarella cheese. The key to this dish, in my opinion, is to sprinkle your salad with a nice amount of salt just before serving. Some people add a simple vinaigrette to this dish but I believe this to be totally worthless, if not innapropriate, when you have good fresh ingredients... the tomatoes will bleed their delicious sweet and sour juice anyways.

Tuesday, August 01, 2006

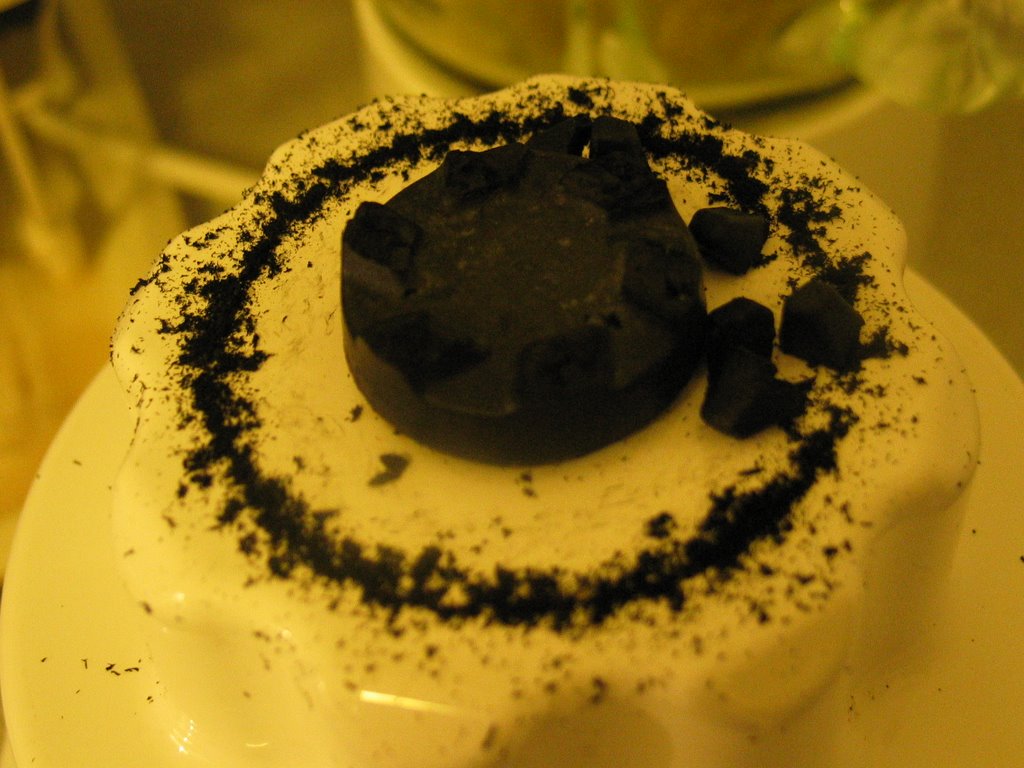
A few nice dishes I did not write about... yet

As you know, I took a few months off blogging and although having a weird work schedule preventing me from cooking as much as I would like, I did prepared a few nice dishes over the last months. For the most part, I did not take any pictures and my very poor memory does not allow me to recall exactly what I ate. Fortunately, I did take a few pictures here and there of certain dishes which I'd like to share with you. You won't find any recipes here as I forgot almost everything about these experiments but smart cooks might find ideas they might want to juggle with or offer comments on similar experiments of their own.
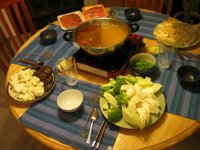
Chinese 'hot pot' or “huo guo” (火锅): this is a winter favourite here at home and it certainly does not require long hours of preparation to enjoy. Like fondue, almost everything is cooked at the table in a variety of flavourful broths. The traditional Szechwan 'mala' broth is seasoned heavily with hot peppers and Szechwan peppers and can be very, very, very, very… spicy. As for myself, I love it the day I eat it and hate it the next day... I'm not sure I'll give more details here, but let’s just say that this dish is spicy for quite a long time after ingestion.
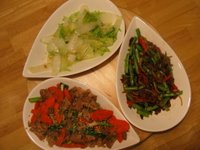
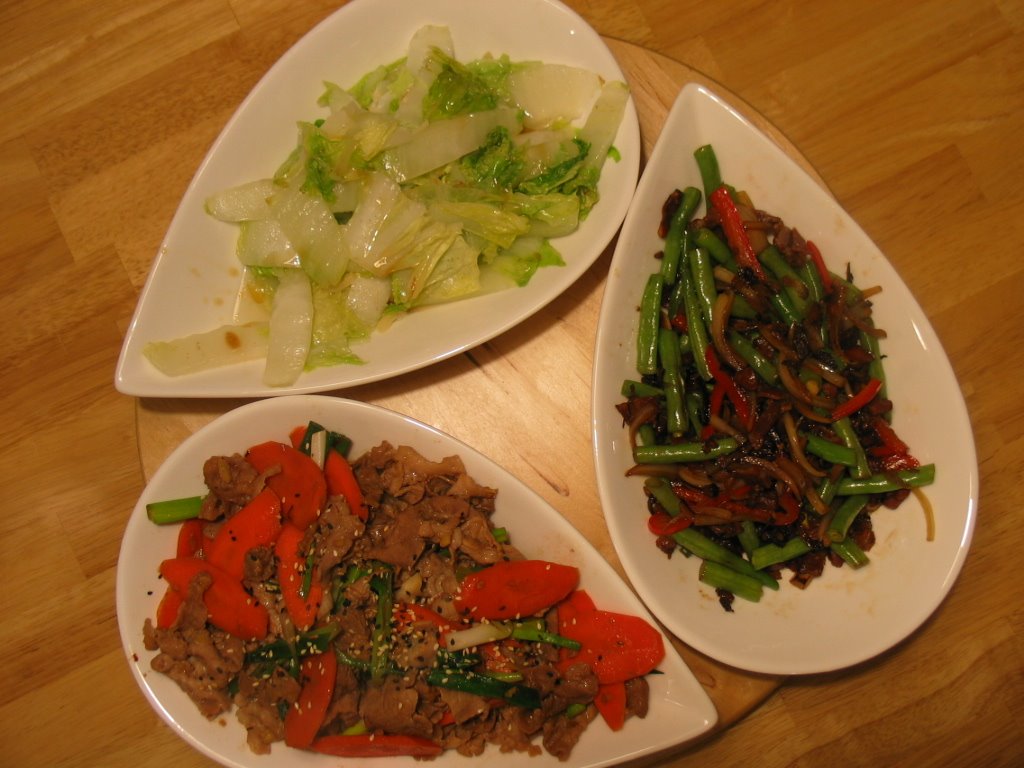
Living with my adorable Chinese partner, I often Chinese food at home. One of the great thing with Chinese cooking is that the produce needed are usually fairly cheap (e.g. cabbage, rice or tofu) but always delicious. Take that napa cabbage dish (the top left dish on the picture), it costs next to nothing, can be enjoyed year round and complement almost anything... and I bet dieticians would say that it is very healthy.


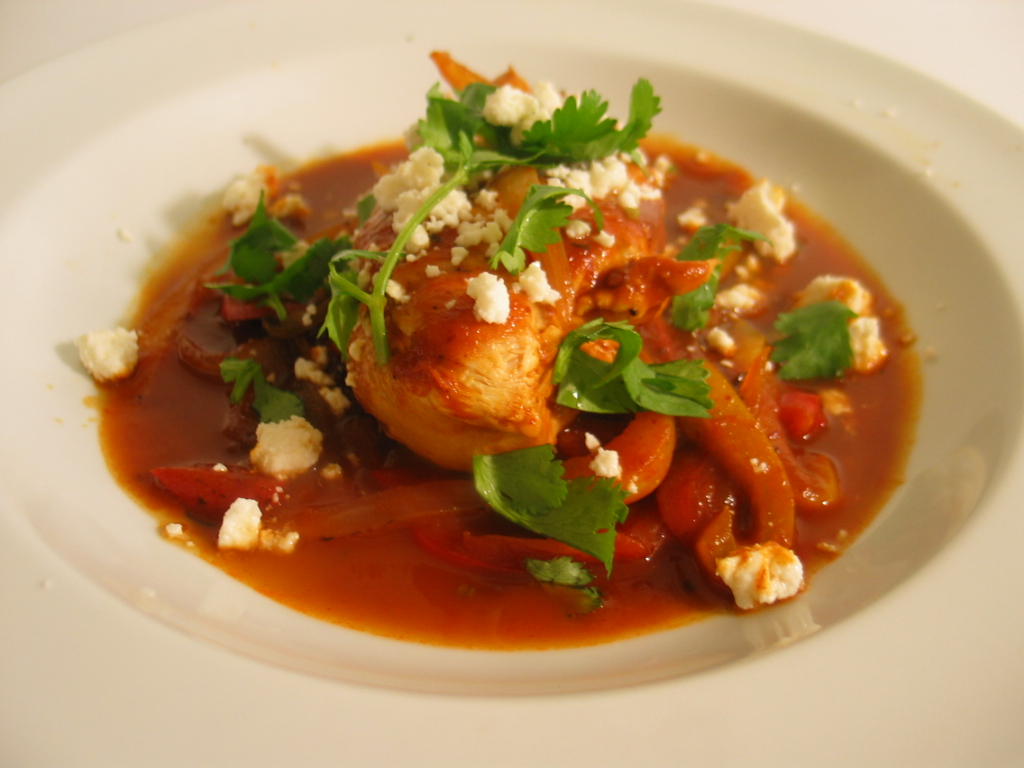
Now, back to North America... If memory serves me well, this dish is chicken in chipotle adobo sauce. Mexican and Americans living in the South West might laugh but true Mexican restaurants are almost nonexistent in this part of Canada and it takes some imagination and a trip to the local Latin-American grocery store to find out how Mexican food might taste like. I'm not so sure I did my job properly but this chicken did taste quite good with its cilantro and queso fresco toping. I have the feeling that roasted corn kennels would also make a nice toping here. Feel free to comment on this one, I still have a lot to learn about Mexican cuisine especially if it does not include taco or tortilla.

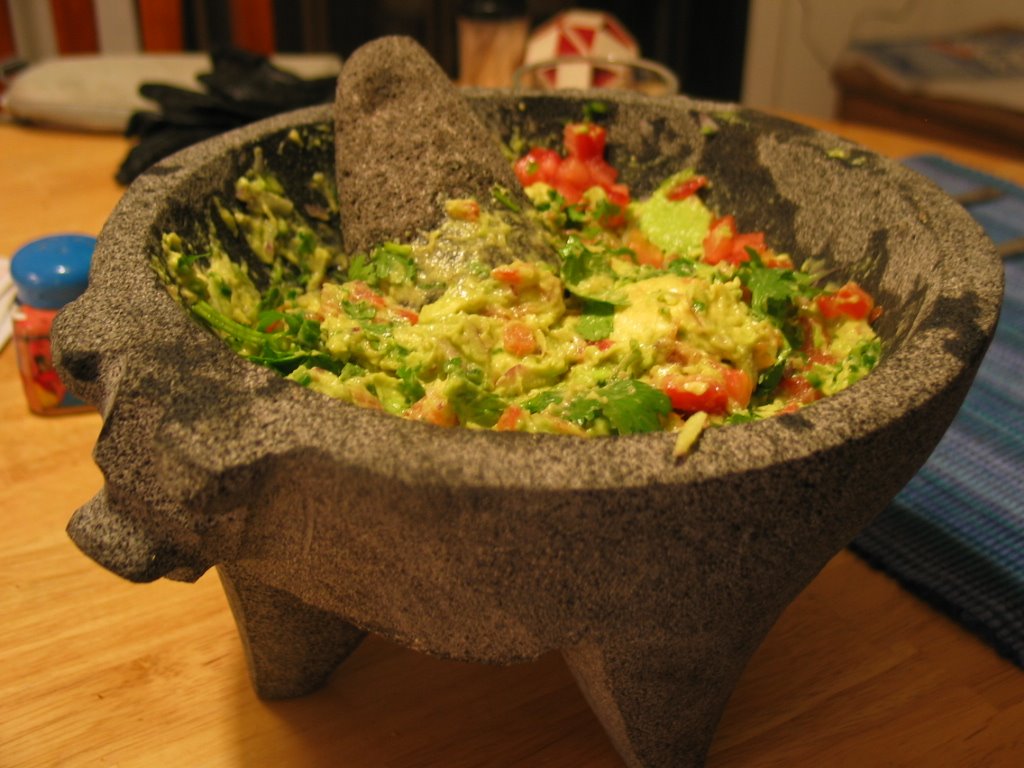
Another Mexican dish: guacamole. I went to Mexico City a few years ago for a conference. I didn't stay there long but took the time to visit the local markets. I found this beautiful molcajete (a Mexican mortar and pestle) made of volcanic rock. Unfortunately I haven't used this great cooking utensil that much but every time I make guacamole, it serves both as the preparation and serving bowl. Nothing says summer like guacamole, corn chips and cold beer so if you live in the northern hemisphere it is the right time to feel inspired.
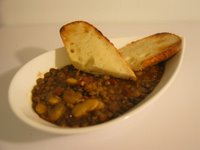
Do you remember my Jamaican inspired pig tail stew? After eating the stew, we still had quite a lot of delicious broth so we decided not to waste anything and cook lentils in it. That was perhaps my greatest culinary discovery of the year. All the flavours from the stew were there and the gelatine from the pig tail formed the most delicious and unctuous sauce one could imagine for lentils. I am now thinking of cooking all my lentils with pork hocks, tails or trotters... too bad for my vegetarian friends! I wonder if one could use agar agar and other vegetarian ingredients to achieve that level of legume goodness.

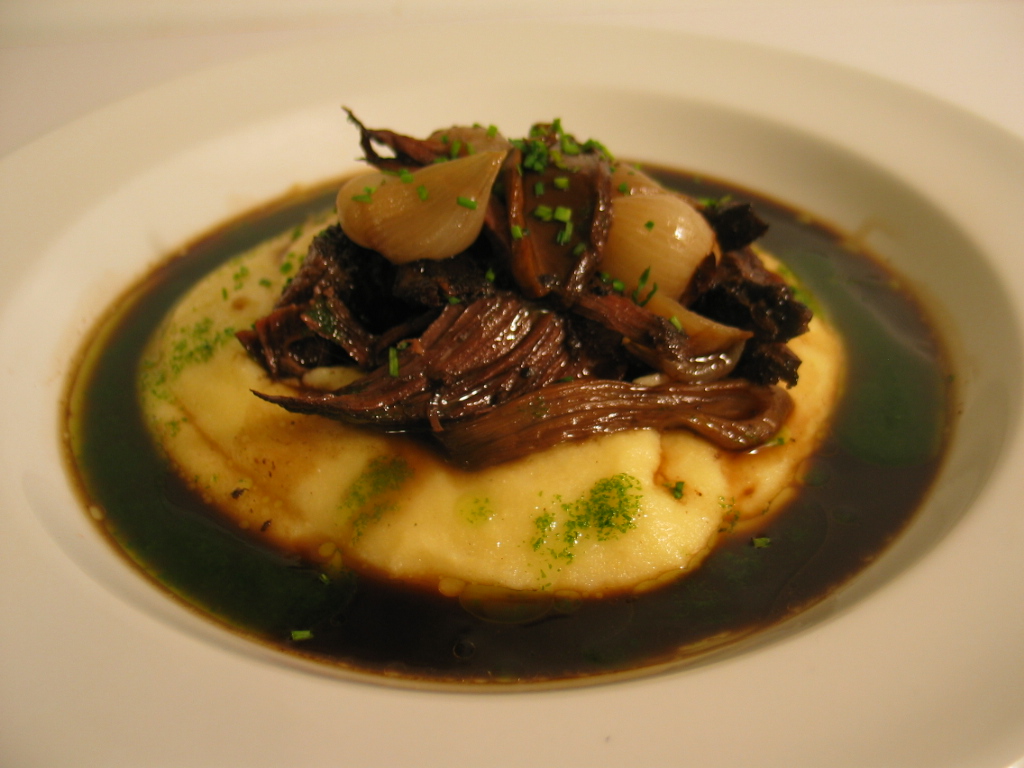
The fact about most meat is that there is only two ways of cooking it: you either both sear it and serve it rare to medium or you cook it for hours (smoke, braise, stew...) until it becomes deliciously tender. Almost anything in between is tough and chewy. In my family, beef blade roast has been on the table since long before I was born. It’s a very cheap but quite tough piece of meat with a huge bone in it. We usually cook it for hours with onions and mushrooms, sometimes a bit of wine and some thyme. The end result is always delicious and so is the resulting sauce. This sauce is worth any fancy and expensive sauce you could think of and should not be wasted under any circumstances. Mashed potatoes or egg noodles are perfect starches to soak up this sauce and so is polenta (as shown on this picture).

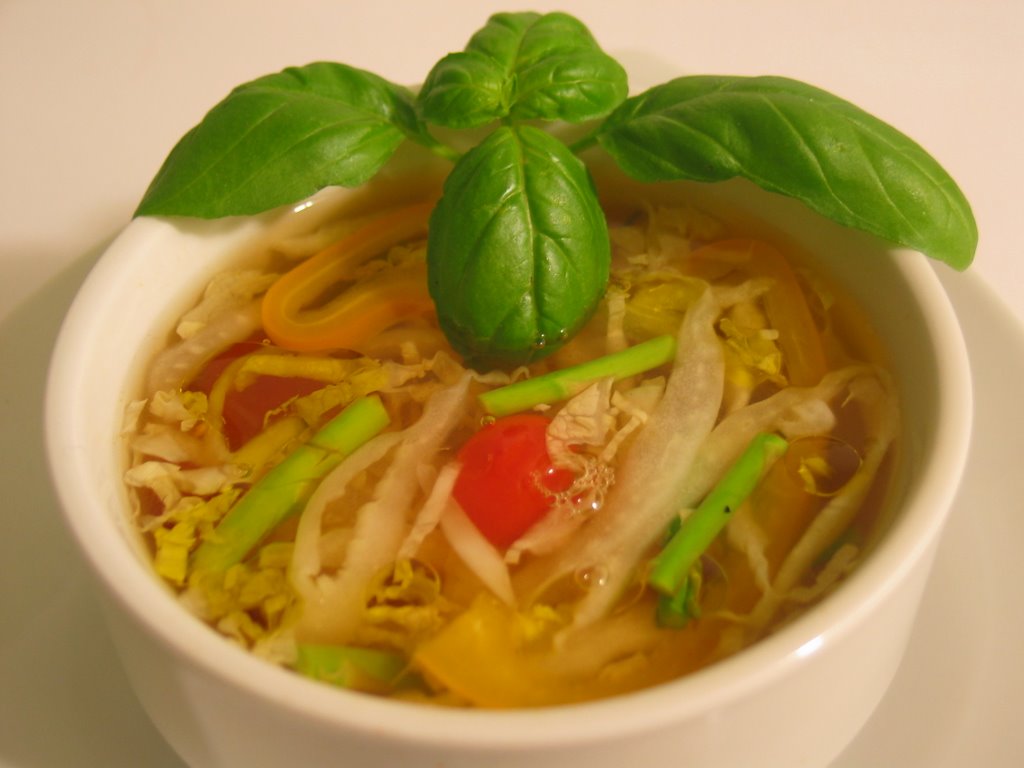
Sometimes however, what we crave for is more on the light side. This soup was made with a few vegetables that were sitting in the fridge. I don't recall what kind of broth I used but if I had to make a similar soup today, I would probably use a lemon grass (or maybe kefir lime leaves) and basil flavoured broth.


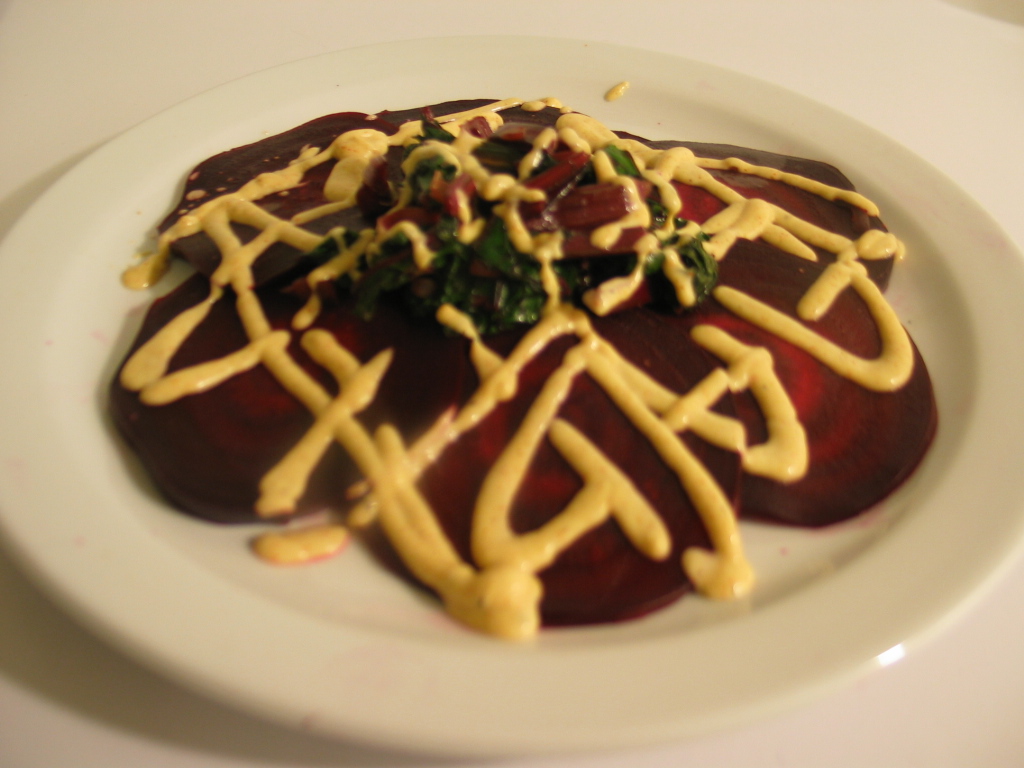
Another nice summery dish, especially now that fresh local beets started to appear in the markets, is a beet carpaccio. Carpaccio is a fairly recent culinary invention born in Italy where ingredients are simply presented flat. It is usually made of raw beef tenderloin cut very finely but I don't see why one could not use anything edible... and many have done so. My version was made of beet roots sliced as finely as I could and served with the leaves sautéed in a little bit of oil and a curry mayonnaise. Let's just say that it was simpler version of one of my Paper Chef (non) entry.

What can you do when your partner does not like chicken but you love it? Transform chicken into something else by adding tons of strong flavours. Fufu does not like chicken here in Canada. To her taste it is bland and mushy. After tasting some good organic chicken here and even better farm raised chicken in China, I understand her dislike of the generic industrial chicken that populate the shelves of supermarkets these days. Let's all be honest here: styrofoam plate chicken does not have much flavour and can be alarmingly tender (not always good thing). But it is also a perfect support for flavour, chicken has a fairly neutral flavour which seems to blend with almost anything. It is this very particularity that I decided to exploit for this honey and balsamic glazed chicken. The bed of root vegetables on which it was served also deserve attention but I'll try to address this in another post.
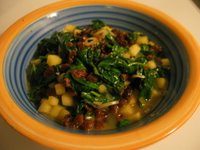
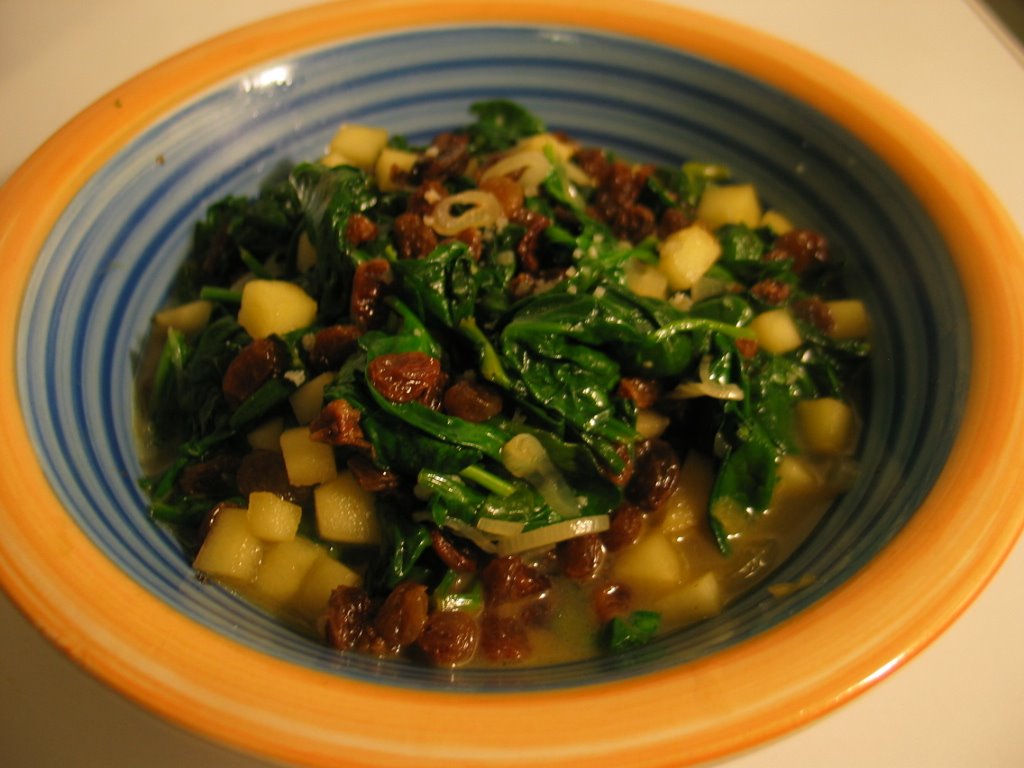
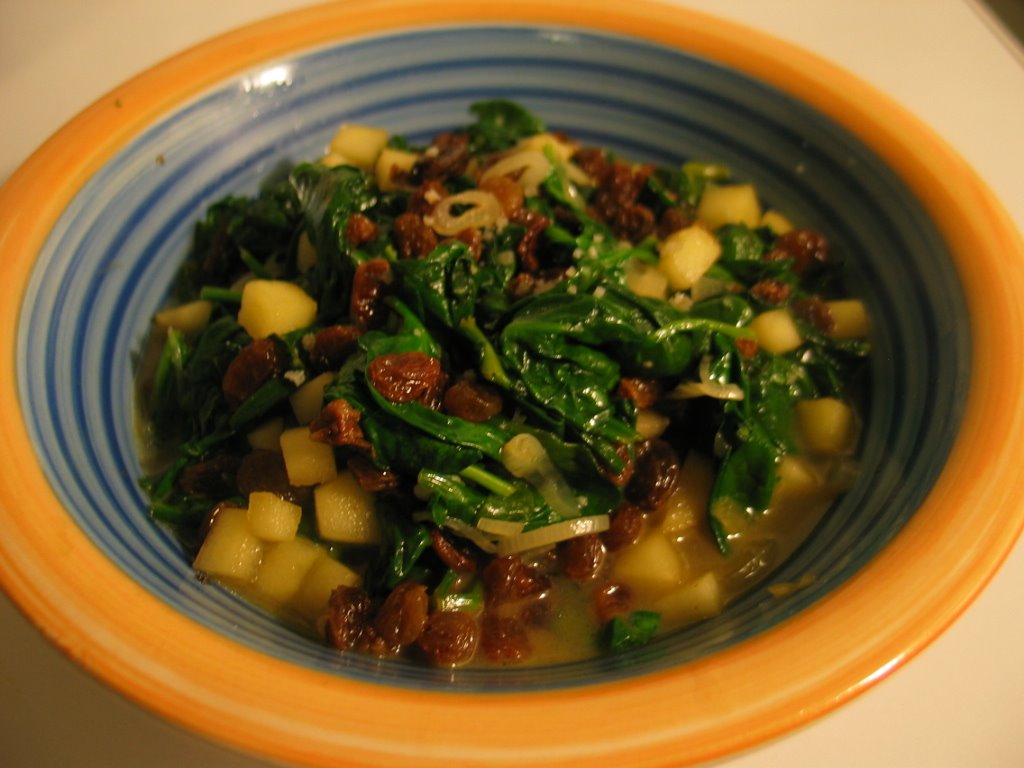
A last dish: spinach with apple and raisins in a sherry sauce. The verdict: good but a little too much on the sweet and acidic side. In other words, too much apple and raisins. Otherwise, a very nice flavour combination.

Sunday, July 16, 2006

Back to blogging

Ok... Where should I start... a lot have happened since my last post. I found a job. I ate and cooked a lot. I didn't write about all of this for many reasons but let’s say that I didn’t put a lot of energy on this blog because I was too busy enjoying life and working.

I plan to get back at blogging but I won't be able to set aside as much writing time as I once used to. From its very beginning, this blog has been a very personal undertaking which developed into a more connected community project like most blogs. I now want to return to this blog to its original focus: my own experience in the kitchen, my experiments, my failures and mistakes, my discoveries and my occasional rants about everything food.

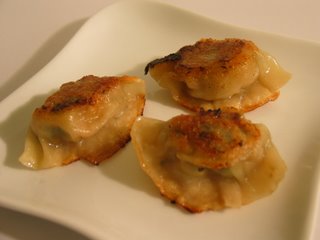
And now, to conclude, the food porn you all expect from a food blog: the close up shot or three pot stickers we made a few months ago.

Wednesday, February 22, 2006

Paper Chef # 15 - The Medal Ceremony

The judges have been carefully reviewing all entries, re-read all the rules, selected finalists for all categories, argued over all the details and finally agreed on a winner in all but one category. A grand winner has been chosen along with a Paper Chef Super Saver, a Paper Chef Indiana Jones and a Paper Chef Picasso but we have a tie in the Home Cook category and the judges have decided it was a good thing after all.

So, who takes it? Whose cuisine will reign supreme?

============

The Super Saver award honours a chef who was able to turn cheap ingredients into culinary masterpiece. The finalists for this category are:


And the winner of the Super Saver award is (drum roll): Tankeduptaco! You just can’t beat legumes and cheap cuts of meat to get the most out of little money… especially when they are so cleverly used and plated.

============

The Indiana Jones award was created to pay tribute to fearless cooks who moved away from their culinary comfort zone and experimented with new ingredients or new techniques. This is exactly what a fairly high number of participants did for this edition of Paper Chef:

  • Noodle Cook experimented boldly with new flavours to create a visually stunning dish.
  • Louise deep-fried for the first time making beautiful beet chips.
  • Haalo used a very bold combination of flavours (sweet, salty and sour) in her spectacular faux-nigiri sushi.
  • Pille candied beet roots to top her superb mascarpone and white chocolate mousse.
  • Surfindaave made beet ice cream… yes, your eyes didn’t fool you: beet ice cream!


The winner of the Indiana Jones award is (drum roll): Haalo! Although none of the judges would have ever thought about combining these ingredients both were thrilled about the idea after reading the fabulous description of the dish.

============

The Picasso award rewards cooks playing close attention to the artistic value of food preparation. As such, dishes that are beautifully plated and/or induce a certain level of thought and contemplation on the part of the observer are particularly valued. The finalists in this category are:
  • Noodle cook for the creation of a gorgeous dish and the play on the judges’ cultural backgrounds in the choice of ingredients and techniques.
  • The Belly Timber duo for the decadent and delightful set of dishes composing their Valentine’s day menu.
  • Stephen for his striking beet and pear salad which reminded the judges of the sun’s sweet warmth at a time of the year when it is particularly lacking (at least for us Northerners).
  • Haalo for her exciting play on Japanese culinary tradition in her fabulous nigiri sushi trompe l’oeil.


And the winner of the Picasso award goes to (drum roll): Noodle Cook whose dish, even after considering the slightly unpleasing combination of flavours, was considered extremely thoughtful and creative.

============

Paper chef Home Cook is awarded to the participant whose culinary talent is put to good use in the creation of dishes meant for the family table and of dishes with a certain comforting quality. The finalists in this category are:

  • Alanna for transforming a 1960’s church cookbook recipe into a pleasant and witty dessert.
  • Marie-Laure for creating delicious and healthy breakfast or snacks which would make your coworkers or your kids’ classmates red with envy.
  • Surfindaave for his great effort at adjusting the menu for the whole family.
  • Louise for the extra care in selecting wholesome food and getting as much information as she can on nutrition.


And the winner of the Home Cook award is (drum roll)… Oh wait! we have a tie! So let’s me rephrase it: the ex aequo winners of the Home Cook Award are: Alanna and Surfindaave! After long deliberations, the judges were unable to find a clear winner in this category. Alanna certainly got extra points for reinventing, with a twist, a very comforting dessert but so did Surfindaave for his hard work at pleasing the whole family. For this reason, and to avoid an unnecessary fight between the two judges, it was decided to grant the Home Cook award to both participants and their excellent entries.
============


And now, for this month’s Paper Chef Grand Winner… perhaps the most difficult category to judge… the finalists are:


And the winner of this edition of Paper Chef is:

(Last drum roll of the day for our exhausted drummer)


Haalo for her amazing and audacious use of the themed ingredients. Both judges were delighted by the playfulness of the dish. A perfect amuse bouche or appetizer that could feature on some of the most extravagant menus of the planet.

============

Finally, we would also like to underline the good use of the resources offered on the culinary blogosphere by Marie-Laure, Pille and Ilva. You sure showed us one of the best sources of inspiration available.

============

Do not forget to visit Tomatilla the first Friday of each month for new editions of Paper Chef. This means next Friday! March the third!

Saturday, February 18, 2006

Cheese Sandwich Day


I have been quite busy with Paper Chef recently but I was able to come up with my own little cheese sandwich contribution (apart from my attempt at creating 'designer' grill cheese sandwiches inspired by the success of the Virgin Mary grill cheese sandwich sold for 28 000$ a few months ago).

Anyway, in case you are not yet familiar with Cheese Sandwich day, it all started with an article from Pete Wells in Food and Wine magazine which annoyed and sometimes even infuriated a great number of food bloggers. For more information, have a look at Kalyn's blog especially this post and this one. There are also excellent comments on this whole debate on Deep end Dining, on Food Musing, Slashfood, Gourmetish, Tiger and Strawberries, Paper Palate, and a number of other blogs. It's amazing to see how such a text can make such an impression on a community of food bloggers.


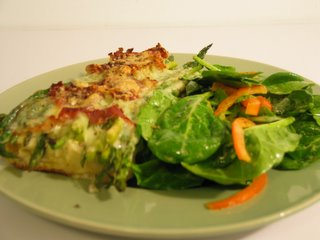
Ok, I admit, my cheese sandwich is not really a sandwich... it is closer to what I grew up calling a 'croque', a French word for a type of open face sandwich. During my teens and early twenties, when meeting friends in the cafes of Québec city, I ordered tons of croque monsieur and croque madame. It was always cheap, tasty and filling... the perfect combination when you are young and living on a student budget. This is a slightly different version from the traditional 'croque monsieur', which is generally toped with béchamel sauce, ham, tomatoe and cheese; my version was made of asparagus, prosciutto ham, gruyere and a mustard flavoured béchamel. It was served on baguette bread and toasted under the salamander for a few minutes. Add a simple salad and you got the perfect cafe/bistro meal!